Wizard
Pick your joints: dado, rabbet, groove, butt, pocket screws
The wizard's Joinery step sets one joint for each kind of connection in your design, used everywhere it occurs. A dado or rabbet makes the part going into it longer by its depth at each end, so the cut sizes change with your choice.
Steps
-
Open a project made with the wizard and click the wand button in the top bar, Edit design. The wizard opens on its last step.
-
Click the heading of step 5 Joinery. There is one row for each connection in this design: here Side to bottom (Dado, 3/8), Back to carcass (Rabbet, 3/8) and Stretcher to side (Pocket screws).
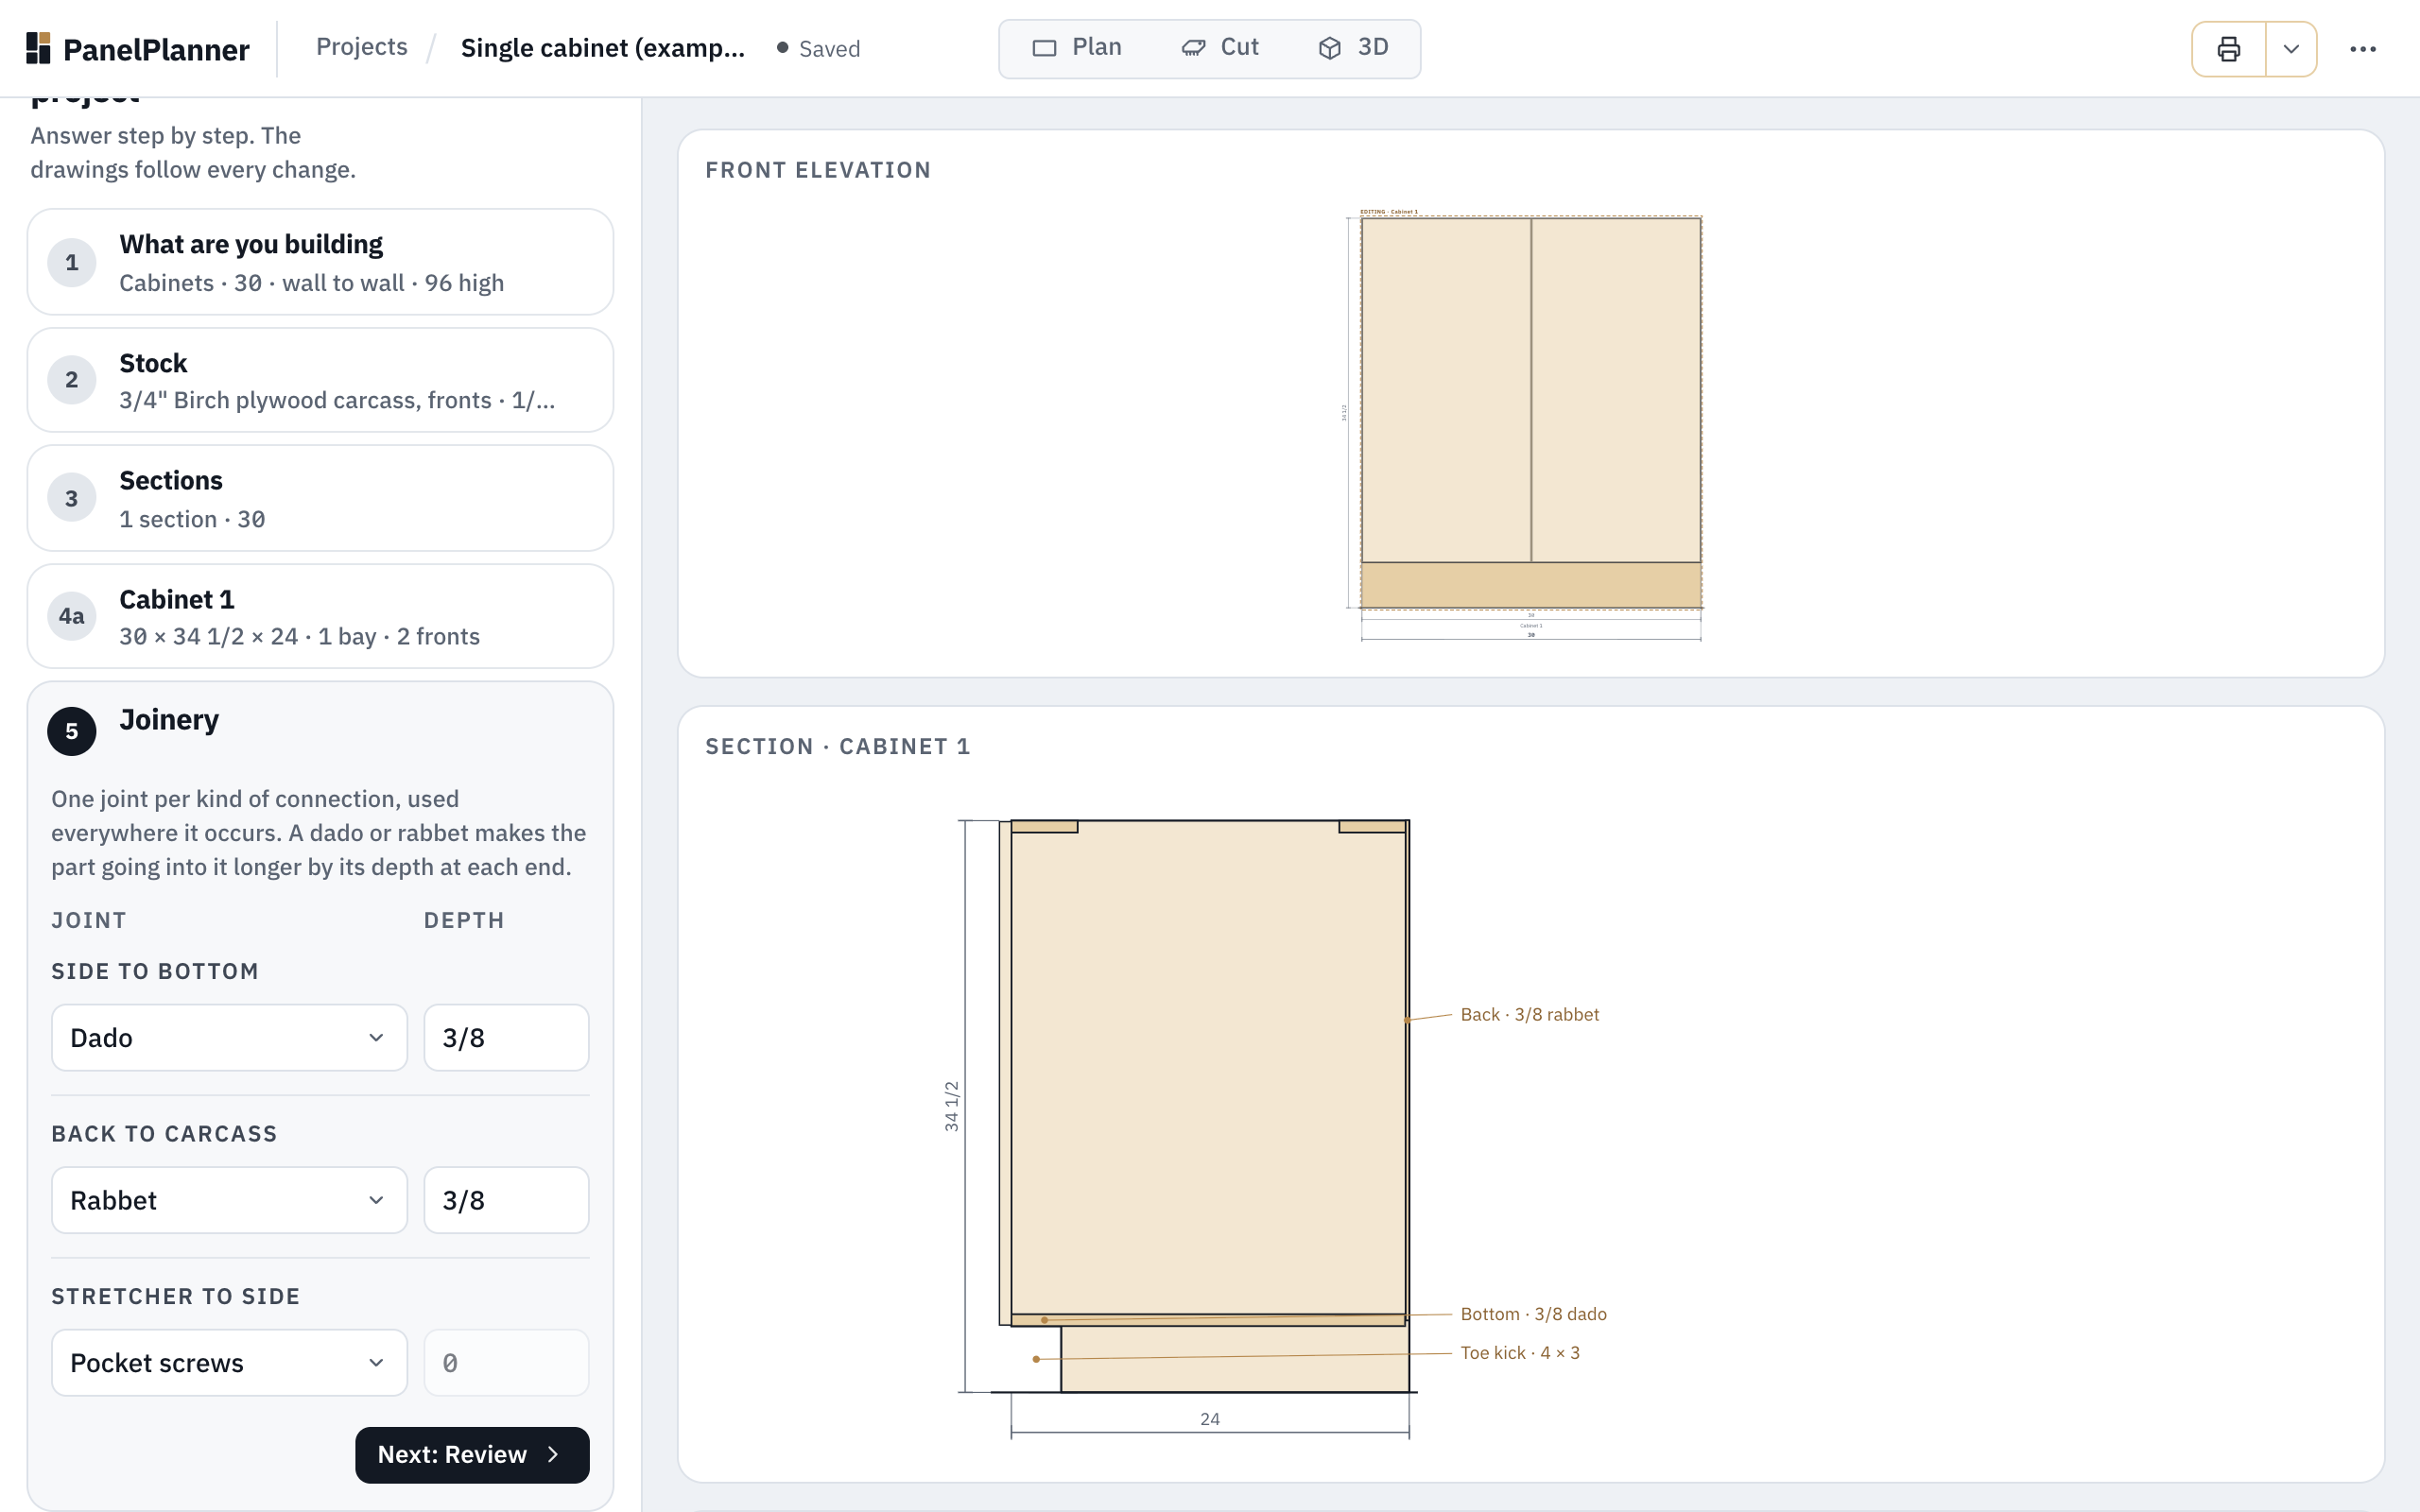
Joinery on the single cabinet. The section drawing labels each joint: Back · 3/8 rabbet, Bottom · 3/8 dado. -
Open a row's joint menu and pick one: Dado, Rabbet, Groove, Butt joint, Pocket screws or Biscuits or dominos. Here, set Side to bottom to Pocket screws.
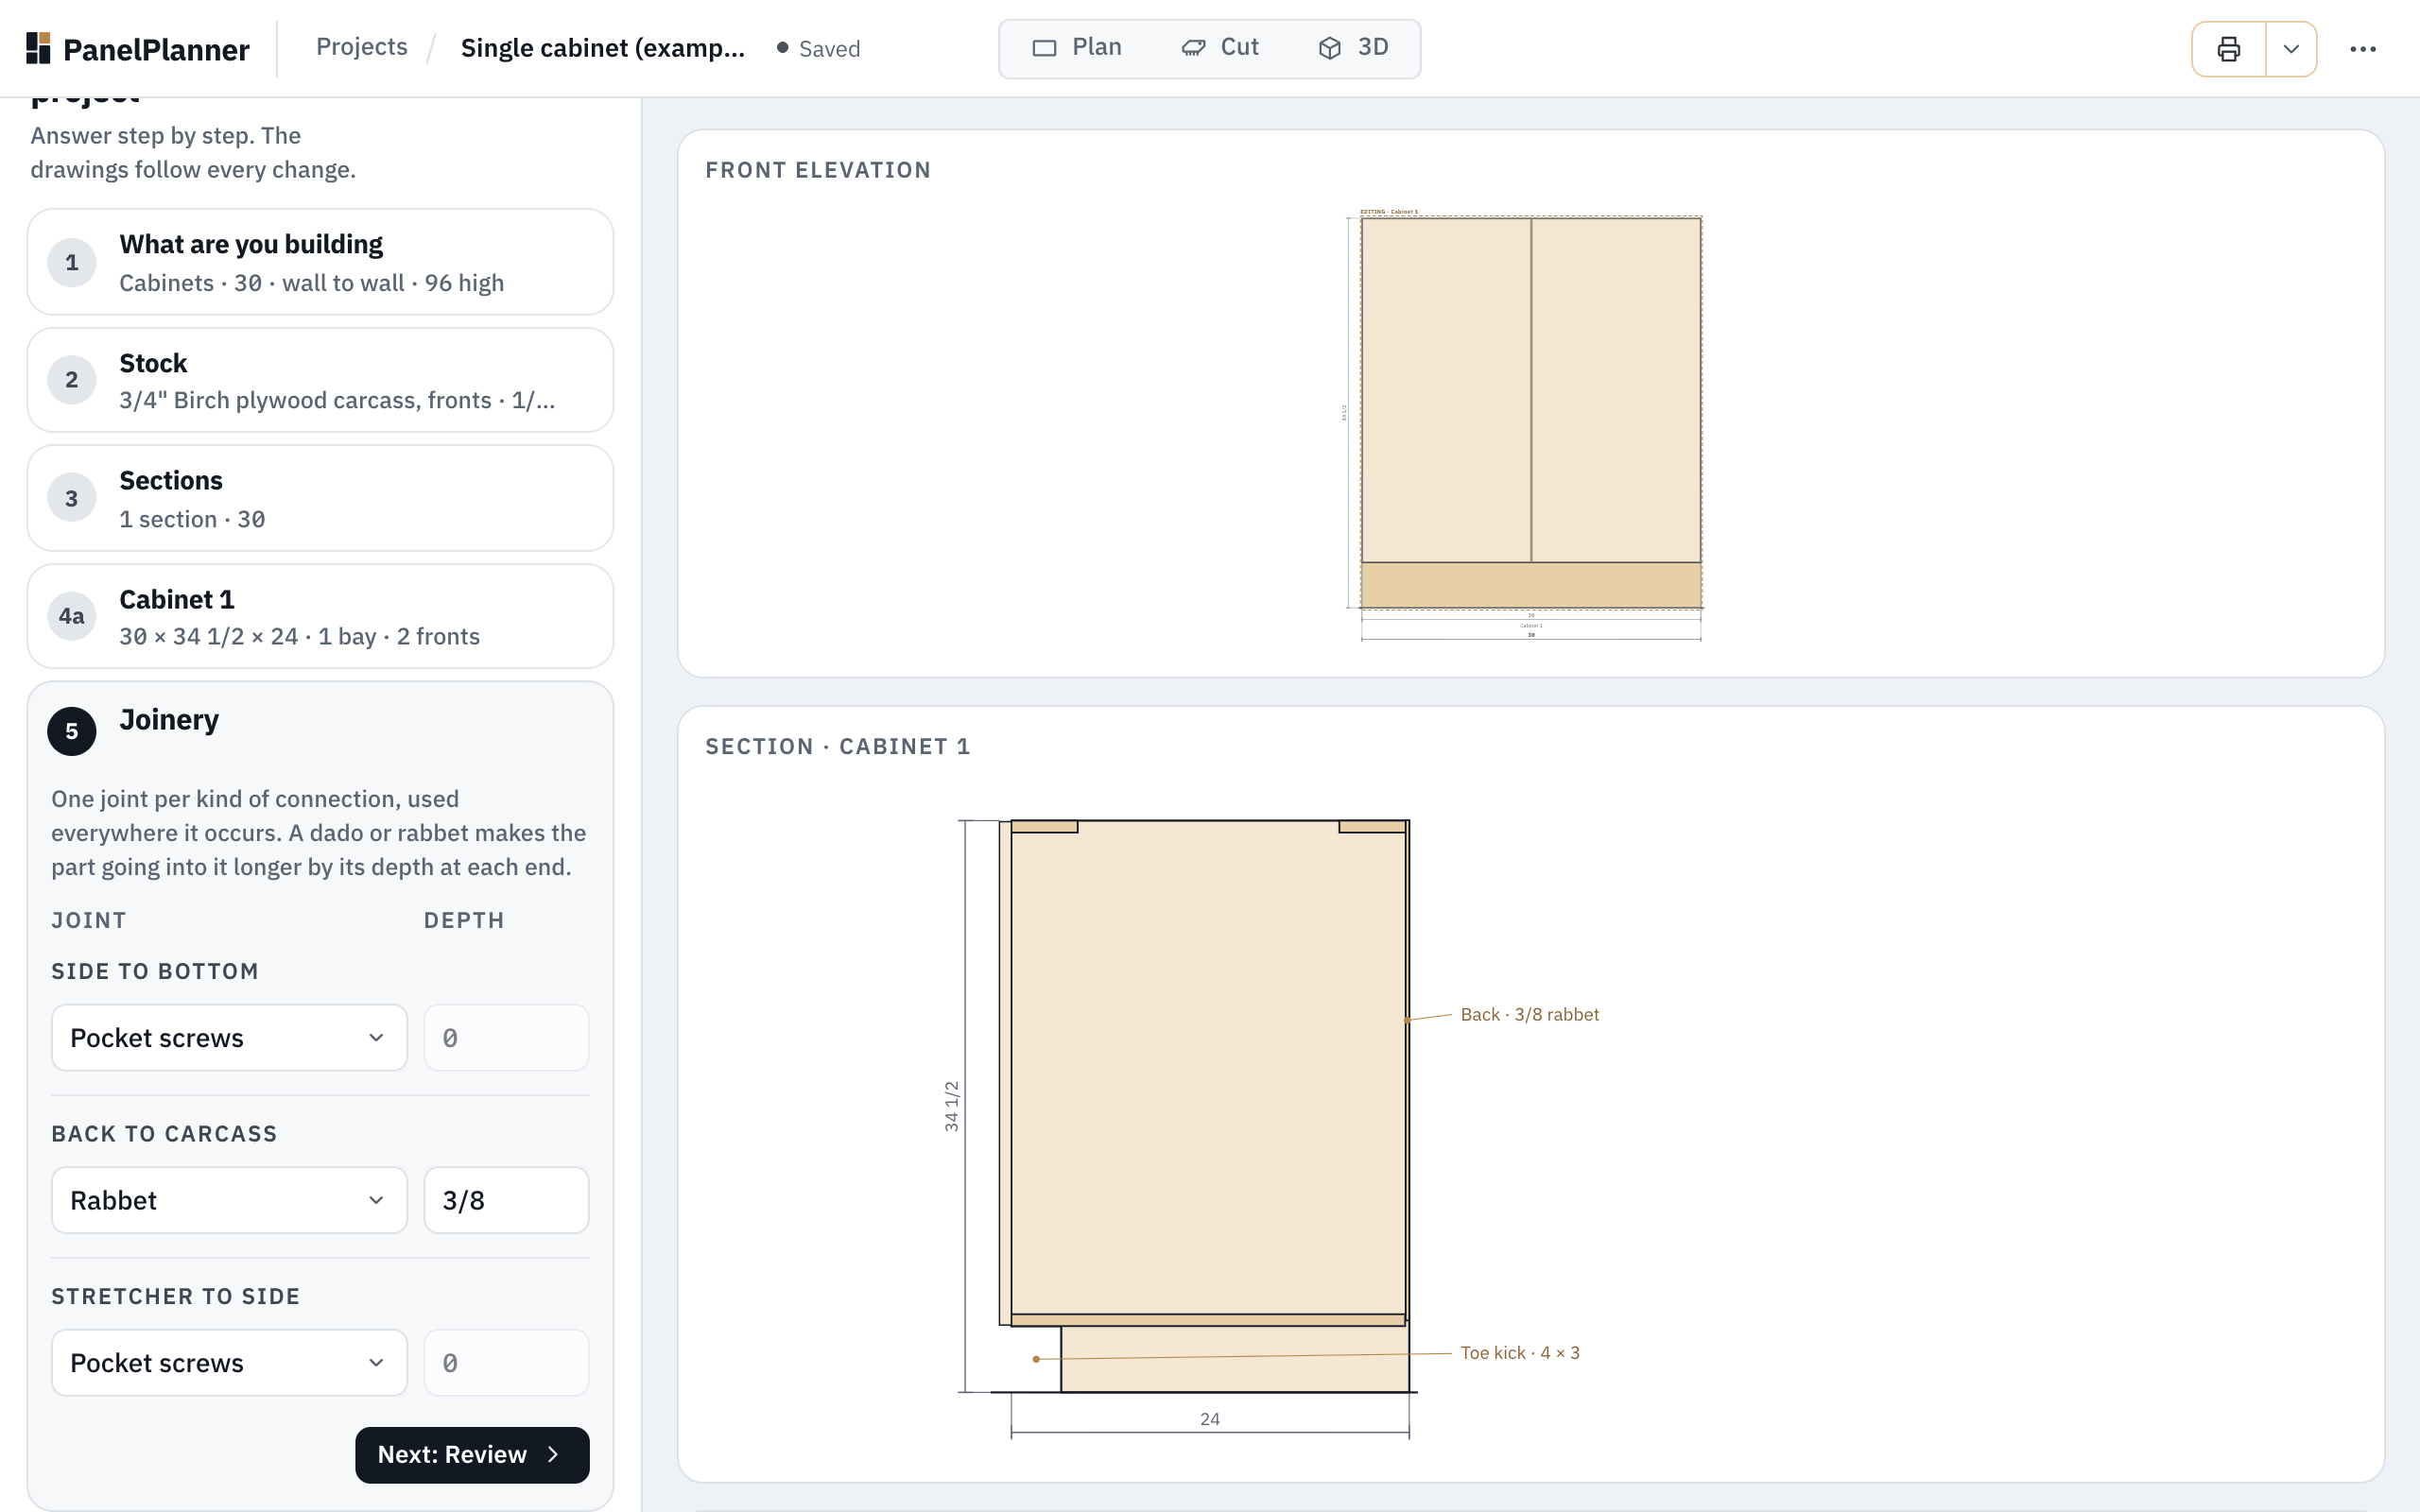
Pocket screws need no depth, so the field greys out, and the bottom dado leaves the drawing. -
For a dado, rabbet or groove, type the Depth. A butt joint, pocket screws and biscuits have no depth.
-
Click Next: Review, then Generate cut listPro. If you have changed parts by hand since the last Generate, it asks first: Keep my changes, or Find the best layout again, which overwrites them.
Good to know
- The wizard fills in a joint for every connection to start: dadoes for the bottom, top and fixed shelves, a rabbet for the back, pocket screws for stretchers and the toe kick.
- The joints print with the shop report and go in each part's notes, so you know which parts get a dado and where.
- Choosing joints is free; Generate cut list is part of Pro.
Try it
Try it Opens the single cabinet example as your own copy. Click Edit design, then 5 Joinery.