Planner
See and move parts in 3DPro
The 3D view puts your parts together as a cabinet, so you can check the build before you cut anything. You can pull it apart, turn it around and slide parts into place. The pictures use two examples: the 3D view and Explode on Single cabinet (example), and the part drag on Bookshelf (example), whose shelves are open to grab.
Steps
-
Open your project and click 3D in the switch at the top (Plan, Cut, 3D), or press V.
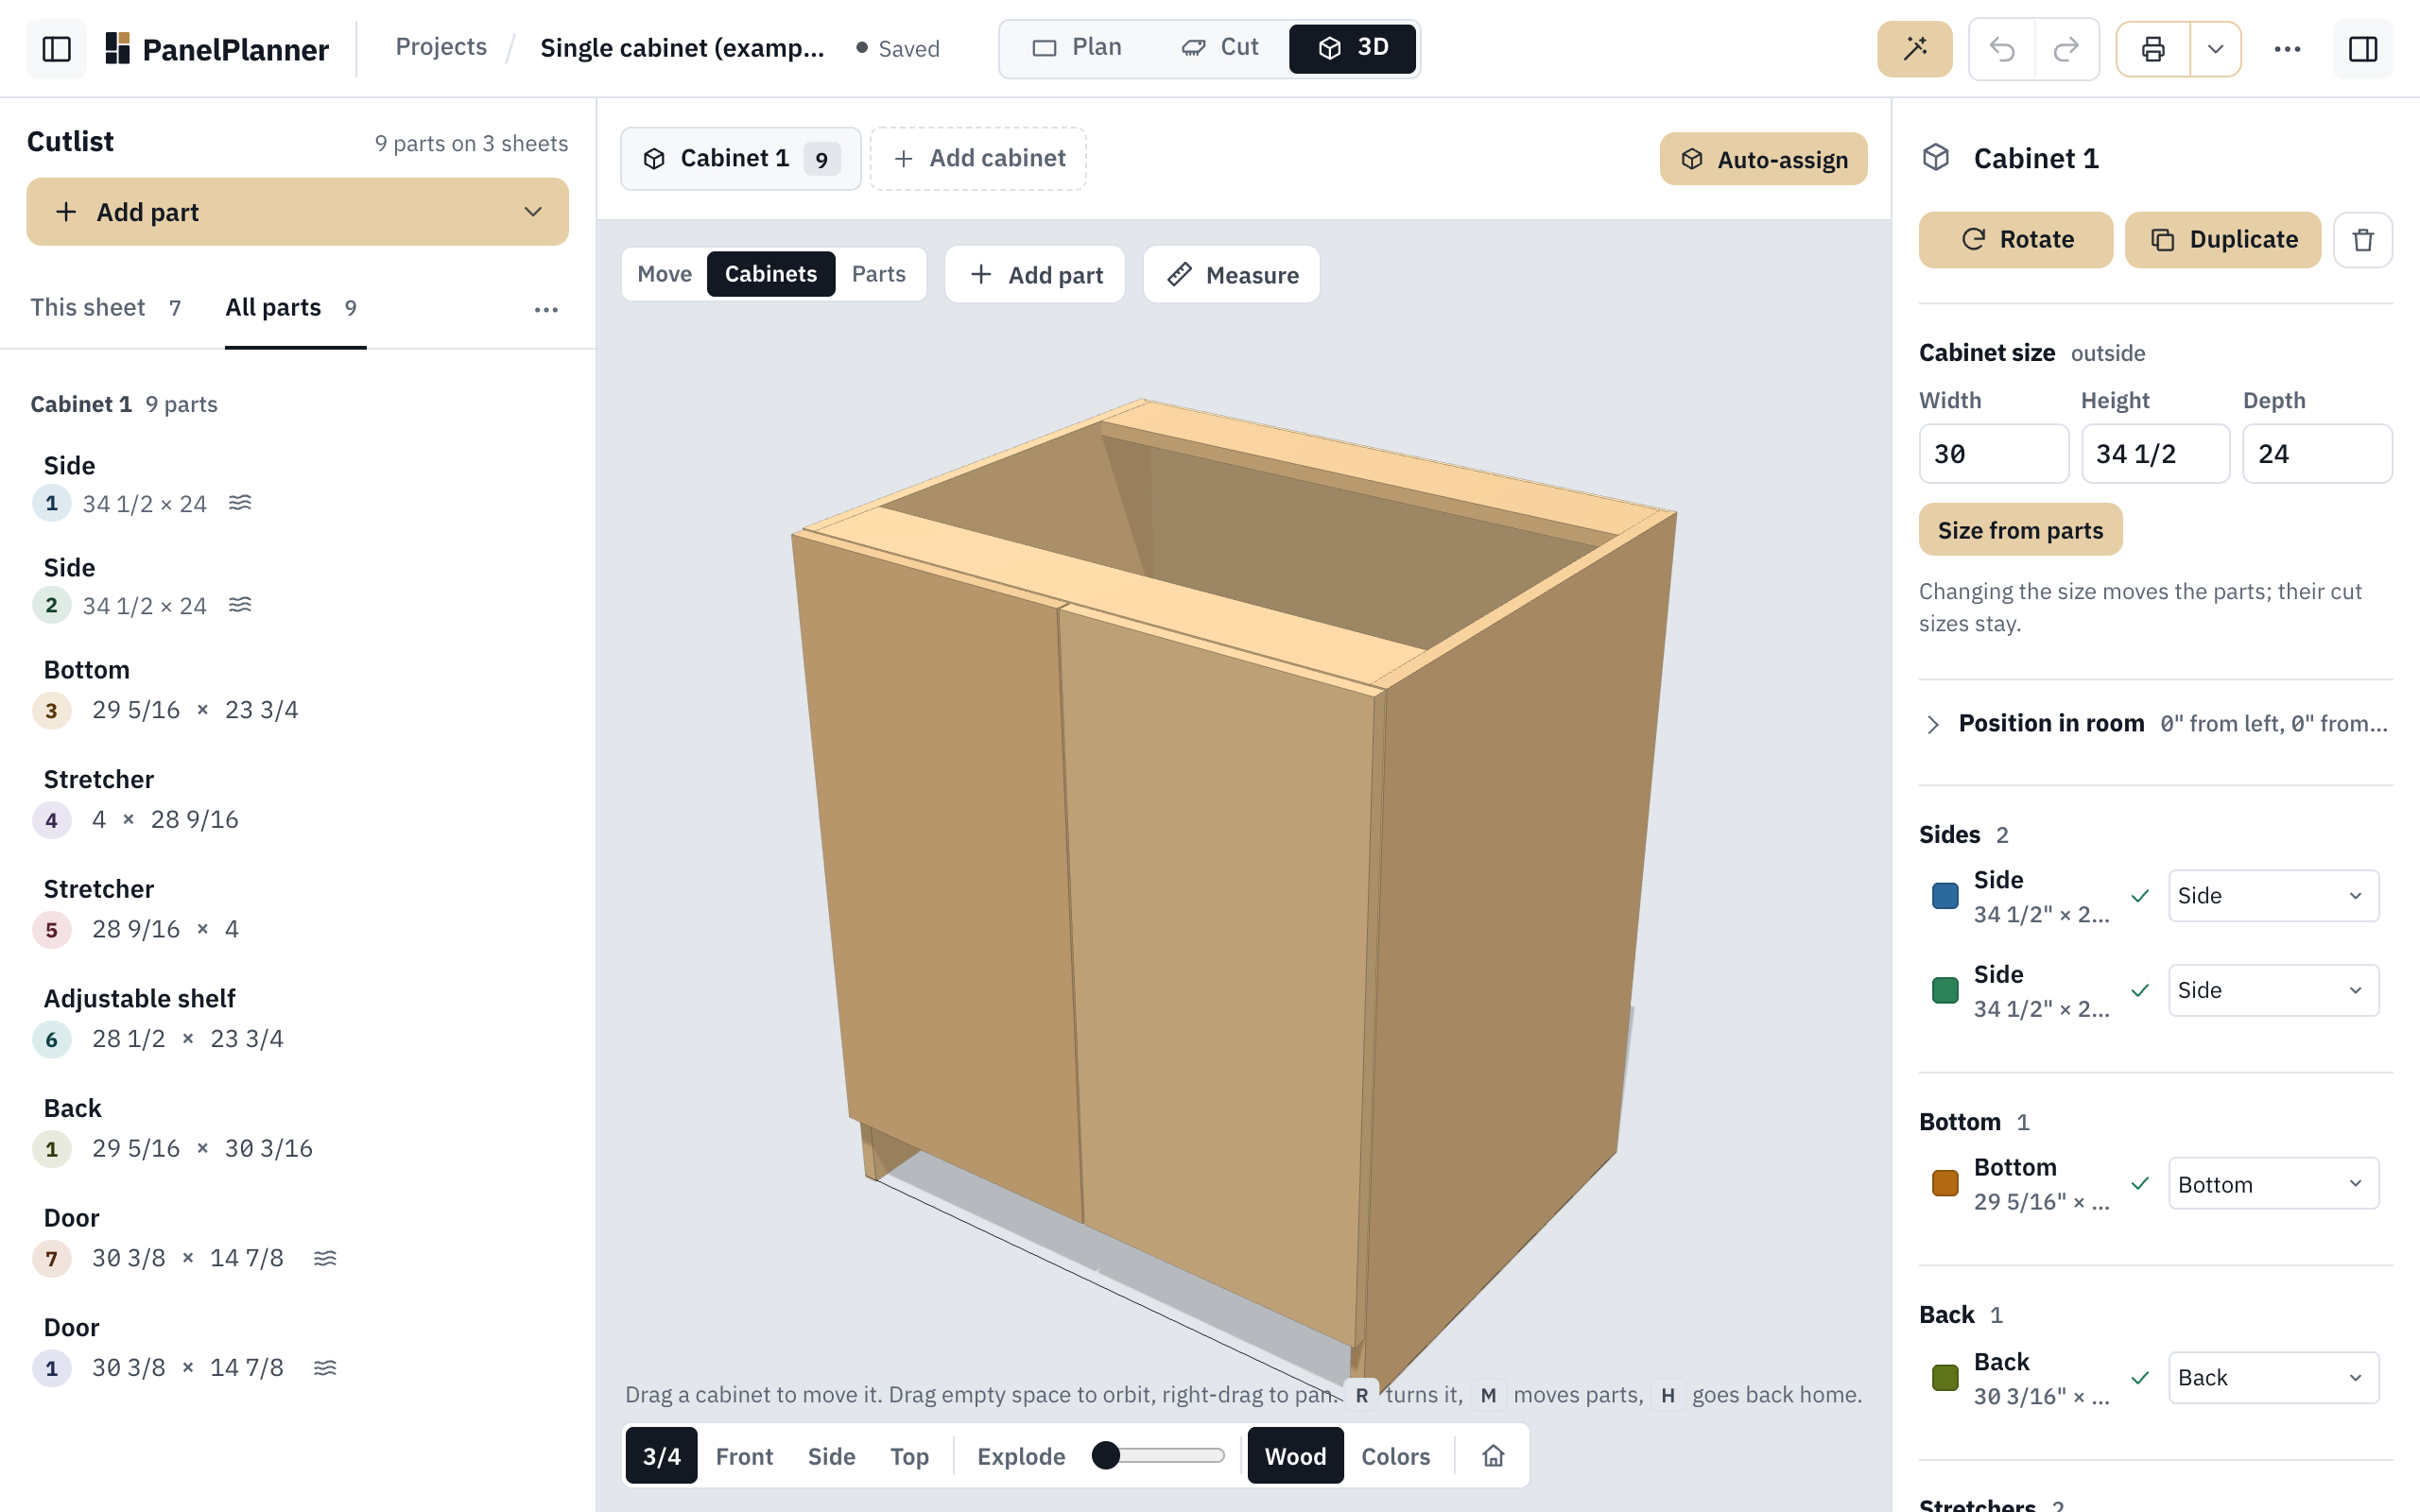
The single cabinet in 3D. The right panel shows the cabinet: 30 × 34 1/2 × 24 outside. -
Look around: drag empty space to orbit, right-drag to pan, and use 3/4, Front, Side and Top in the bottom toolbar for the standard views.
-
Click Explode in the bottom toolbar, or press E, and drag its slider to pull the parts apart and see how they go together.
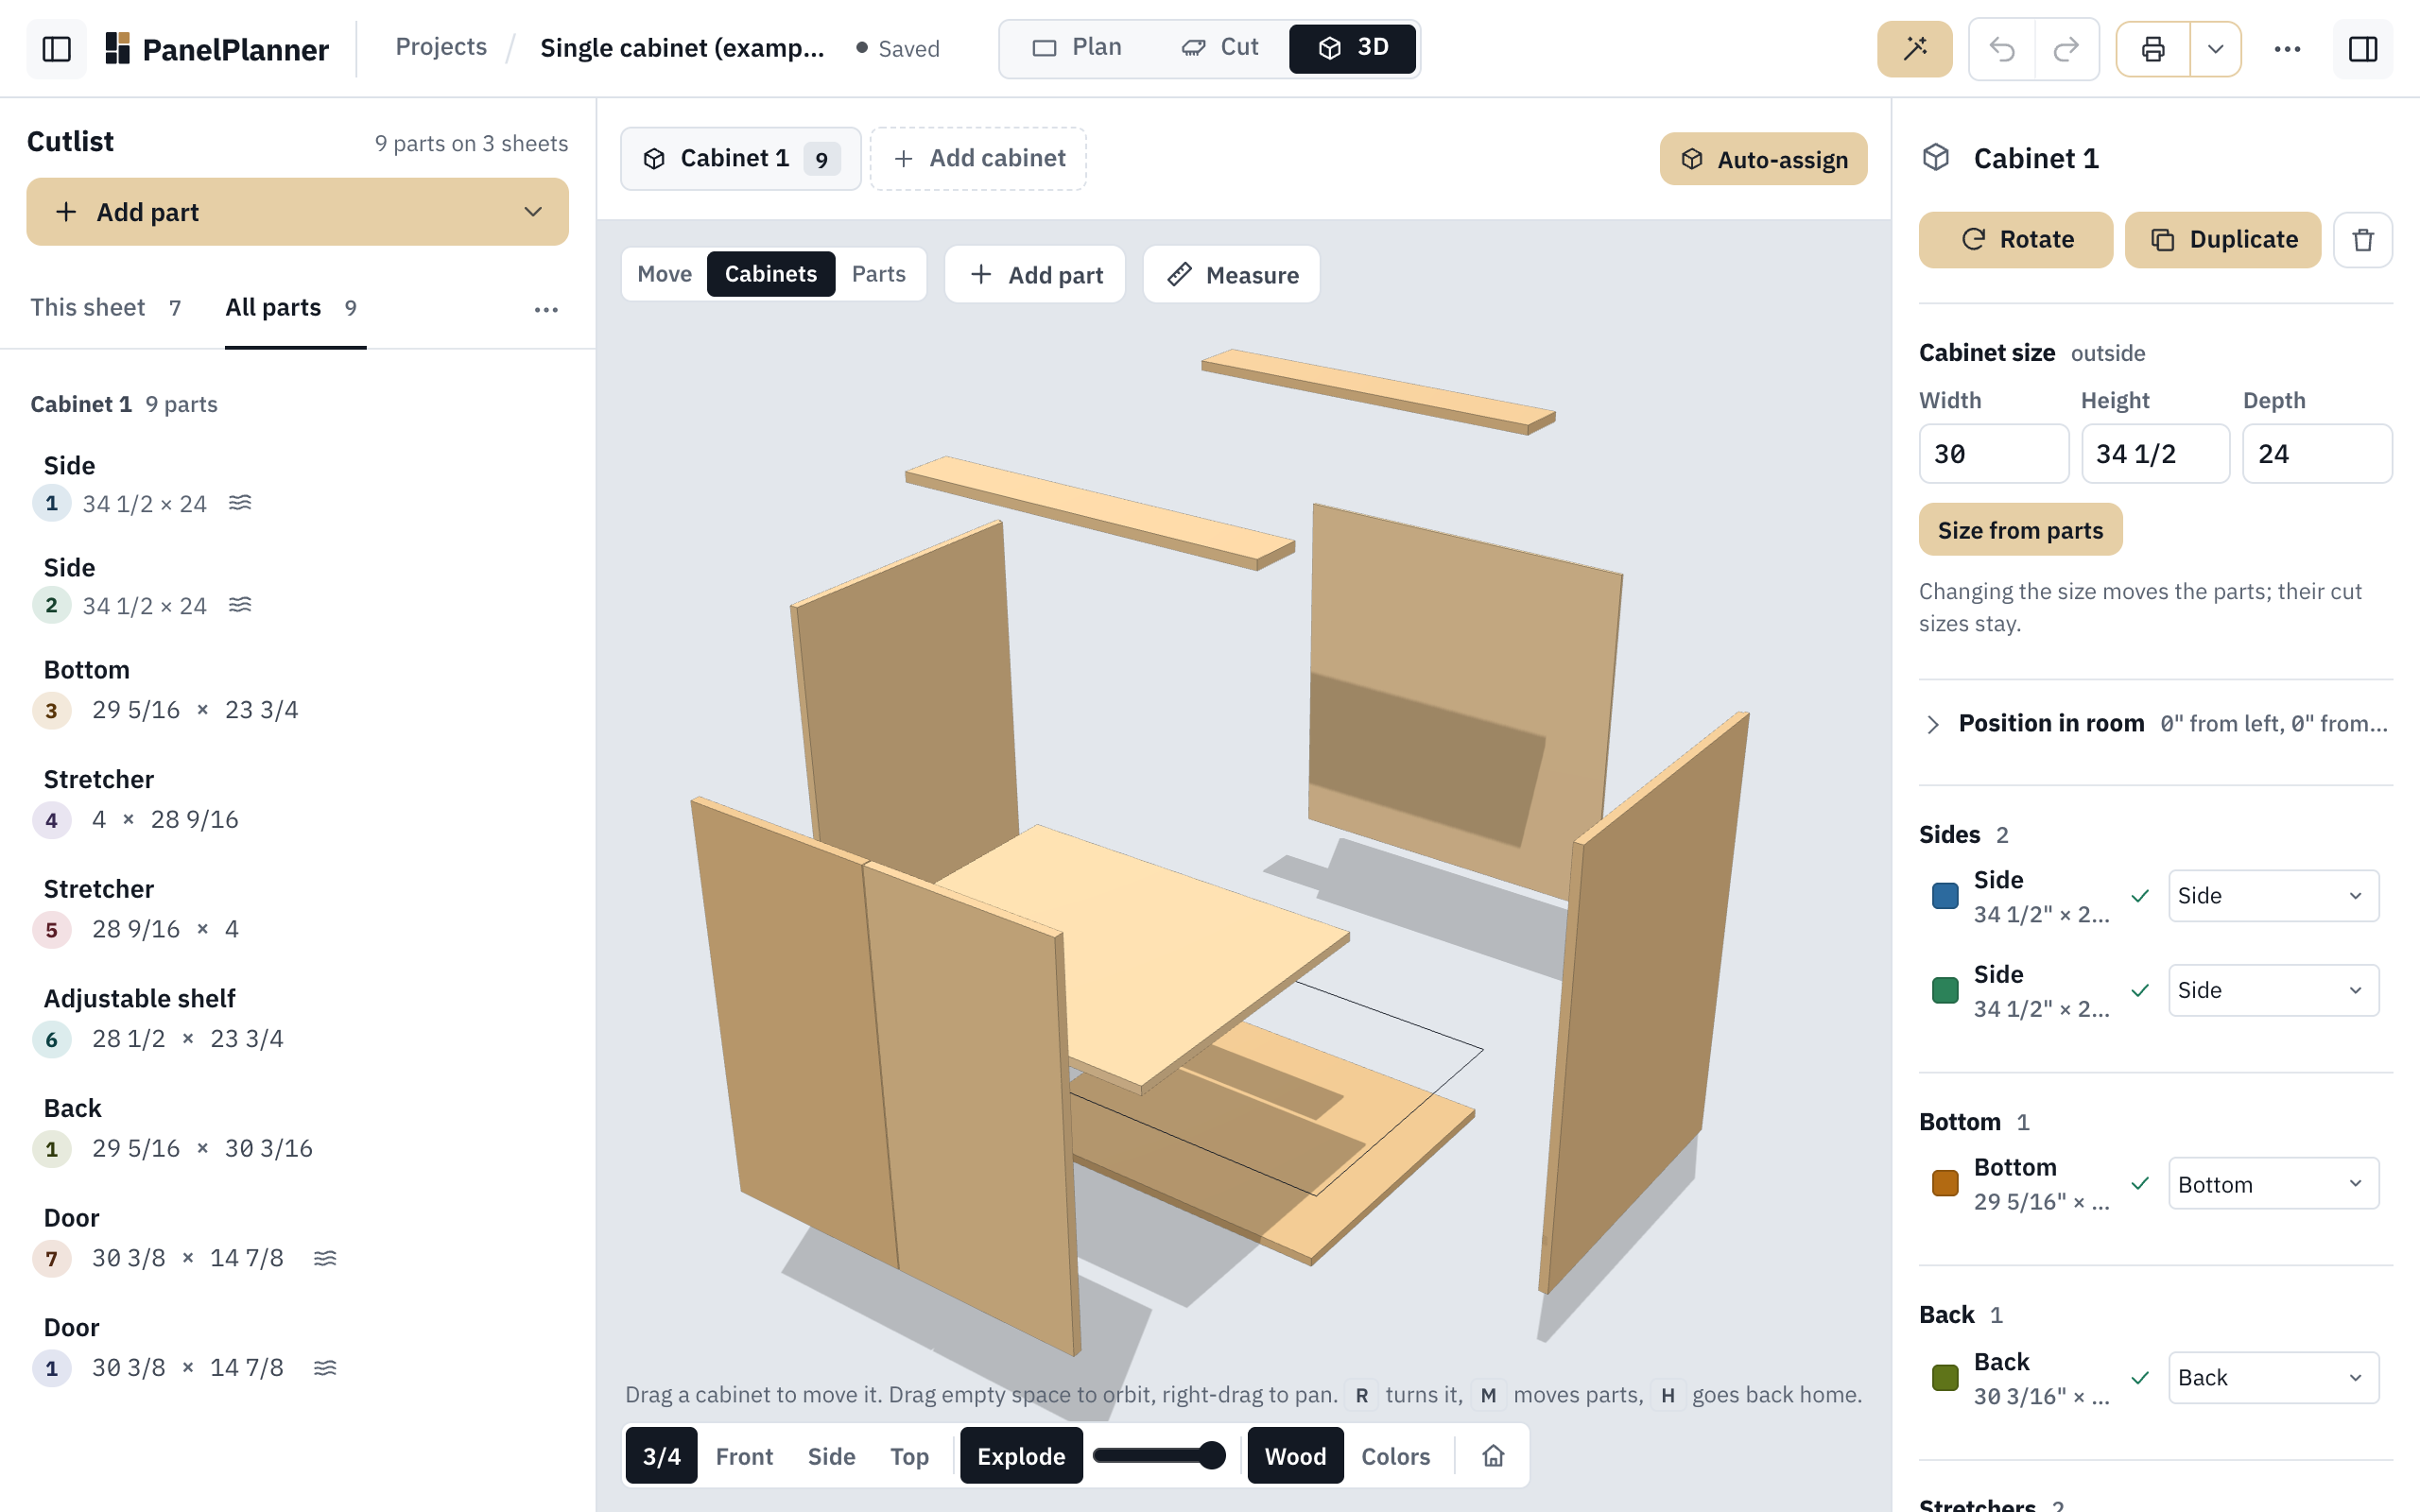
Explode, slider at full: every part of the cabinet pulled away from the others. -
To move a part, click Parts in the Move switch at the top left, or press M. (Cabinets moves whole cabinets across the floor.)
-
Press on a part and drag. It slides one way only, whichever way you start, and snaps flush against other parts. Hold Alt to move it freely. A tag shows where it is as you go.
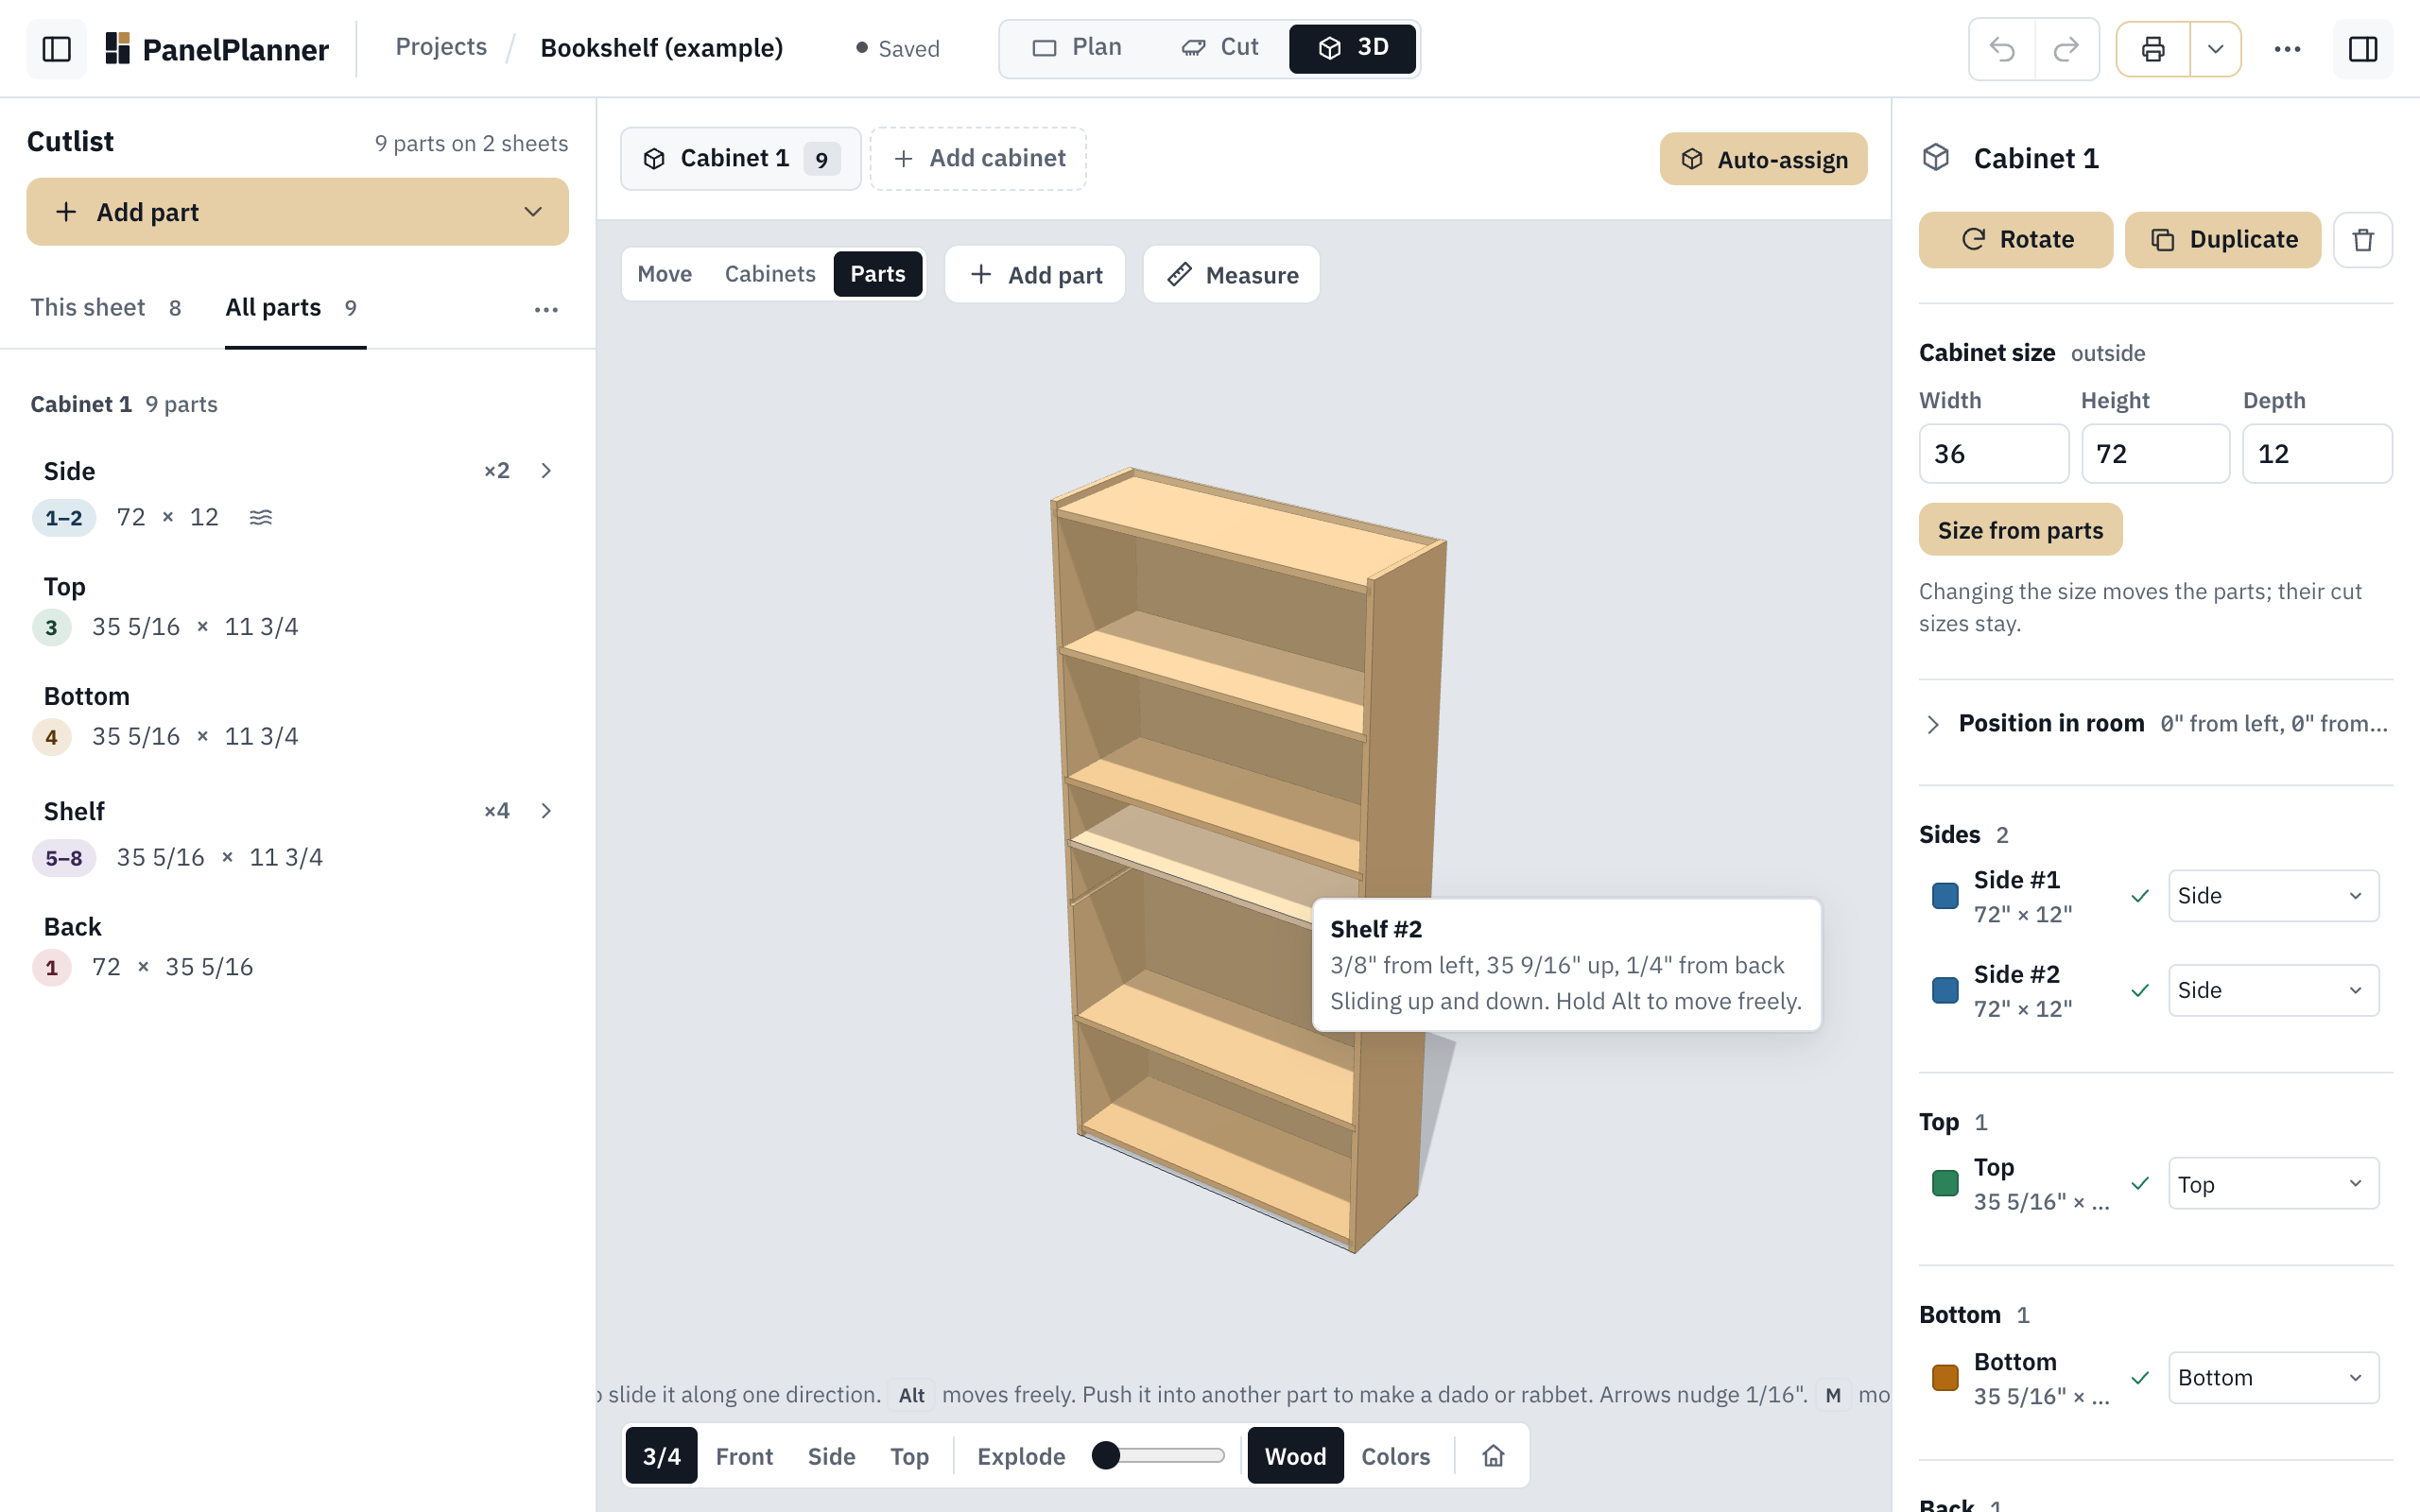
On the bookshelf: dragging Shelf #2 up. The tag reads 35 9/16" up. -
Let go. The right panel shows the part's exact place in From left, Up and From back. Type a number to set it exactly, use the Left, Center, Right, Bottom, Middle, Top, Back and Front buttons to snap it inside the cabinet, or click Put back in its default spot.
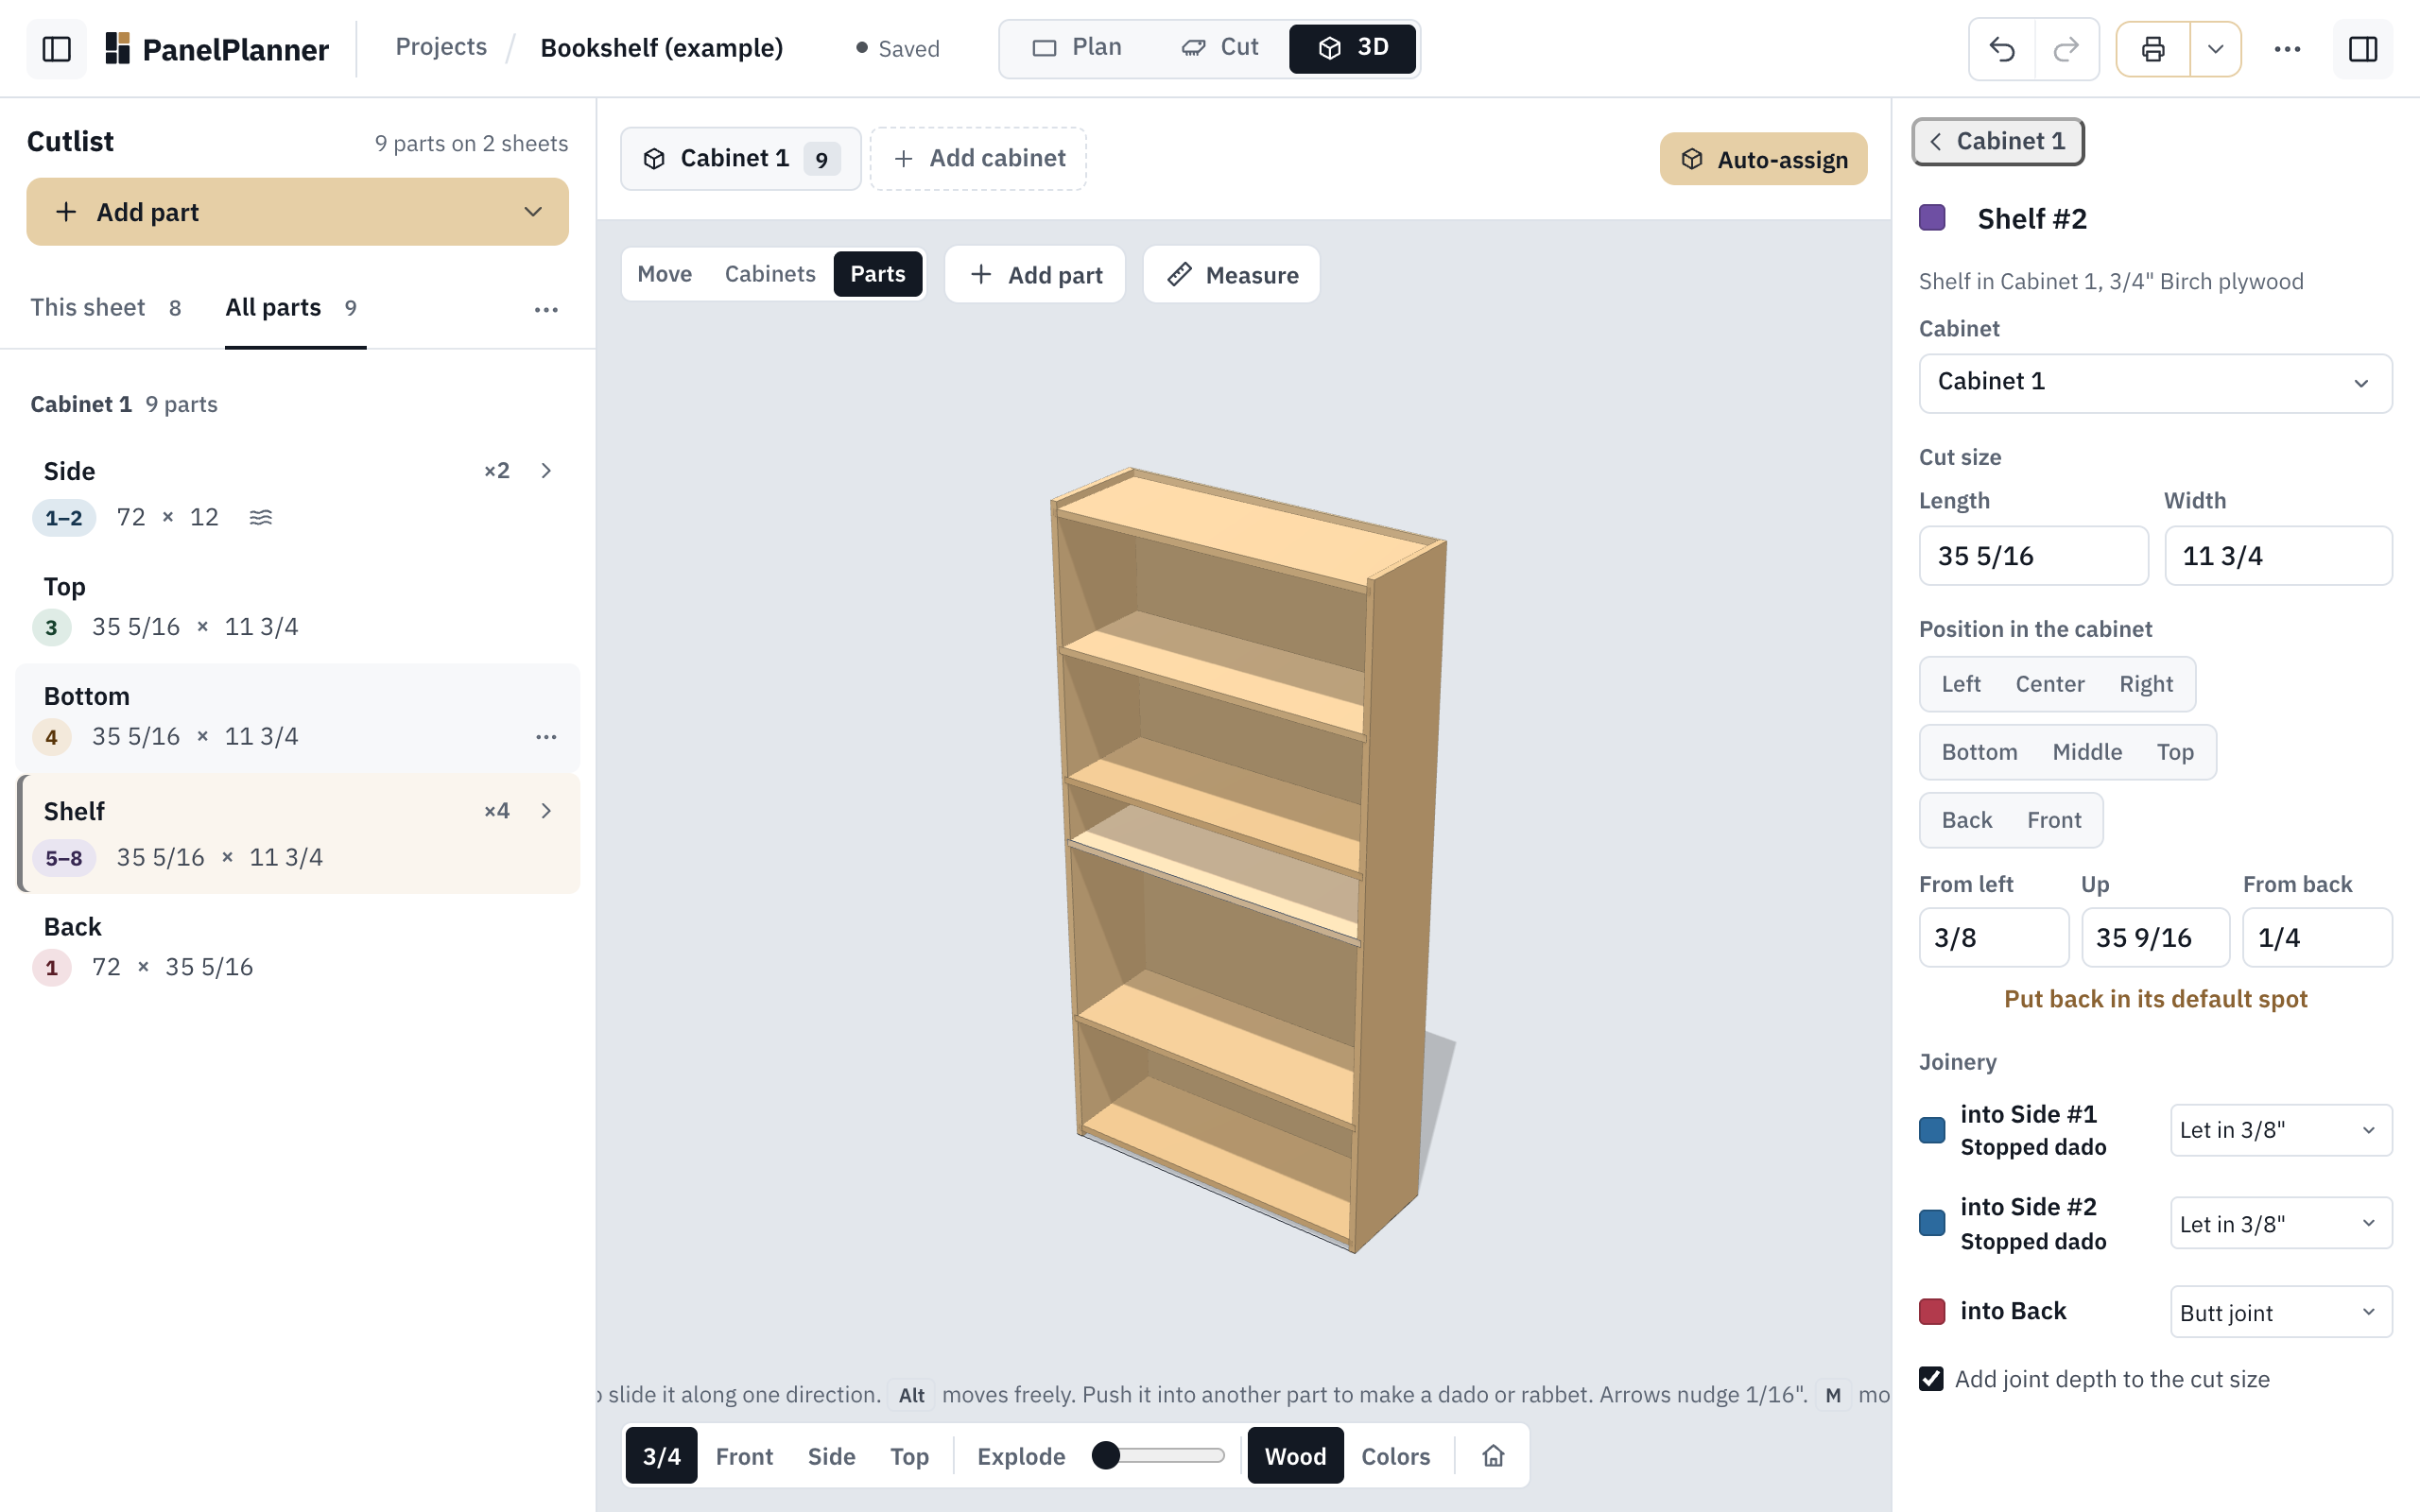
The shelf's place, to the sixteenth: Up 35 9/16. Change any number and the shelf moves.
Good to know
- Sliding a part changes where it sits. Push its end into another part and let go to make a dado or rabbet: the joint is recorded and named for you, and with Add joint depth to the cut size ticked, the part's cut size grows by the depth.
- Measure (or T) measures between any two points; they snap to corners, edges and faces.
- Undo takes back a move, as everywhere in the planner.
- The 3D view is part of Pro. On Free, the 3D button carries a Pro tag and opens the upgrade window.
Try it
Try it Opens the single cabinet example as your own copy; click 3D at the top. To grab a shelf, open the bookshelf example instead: the single cabinet's shelf is behind its doors.