Planner
Drag a piece to another sheet
Sometimes you want parts on a particular sheet: the one with the best face for the parts that show, or an offcut you already have. Drag a part's row in the cut list into another sheet's group and it moves there. The bookshelf example has only one sheet of 3/4" plywood, so this guide adds a second one and puts the sides and the top on it.
Steps
-
With Sheet 1 open, click the + (Add sheet) to the right of the sheet tabs. A new, empty Sheet 3 of the same 3/4" Birch plywood opens. Then click All parts at the top of the Cutlist.
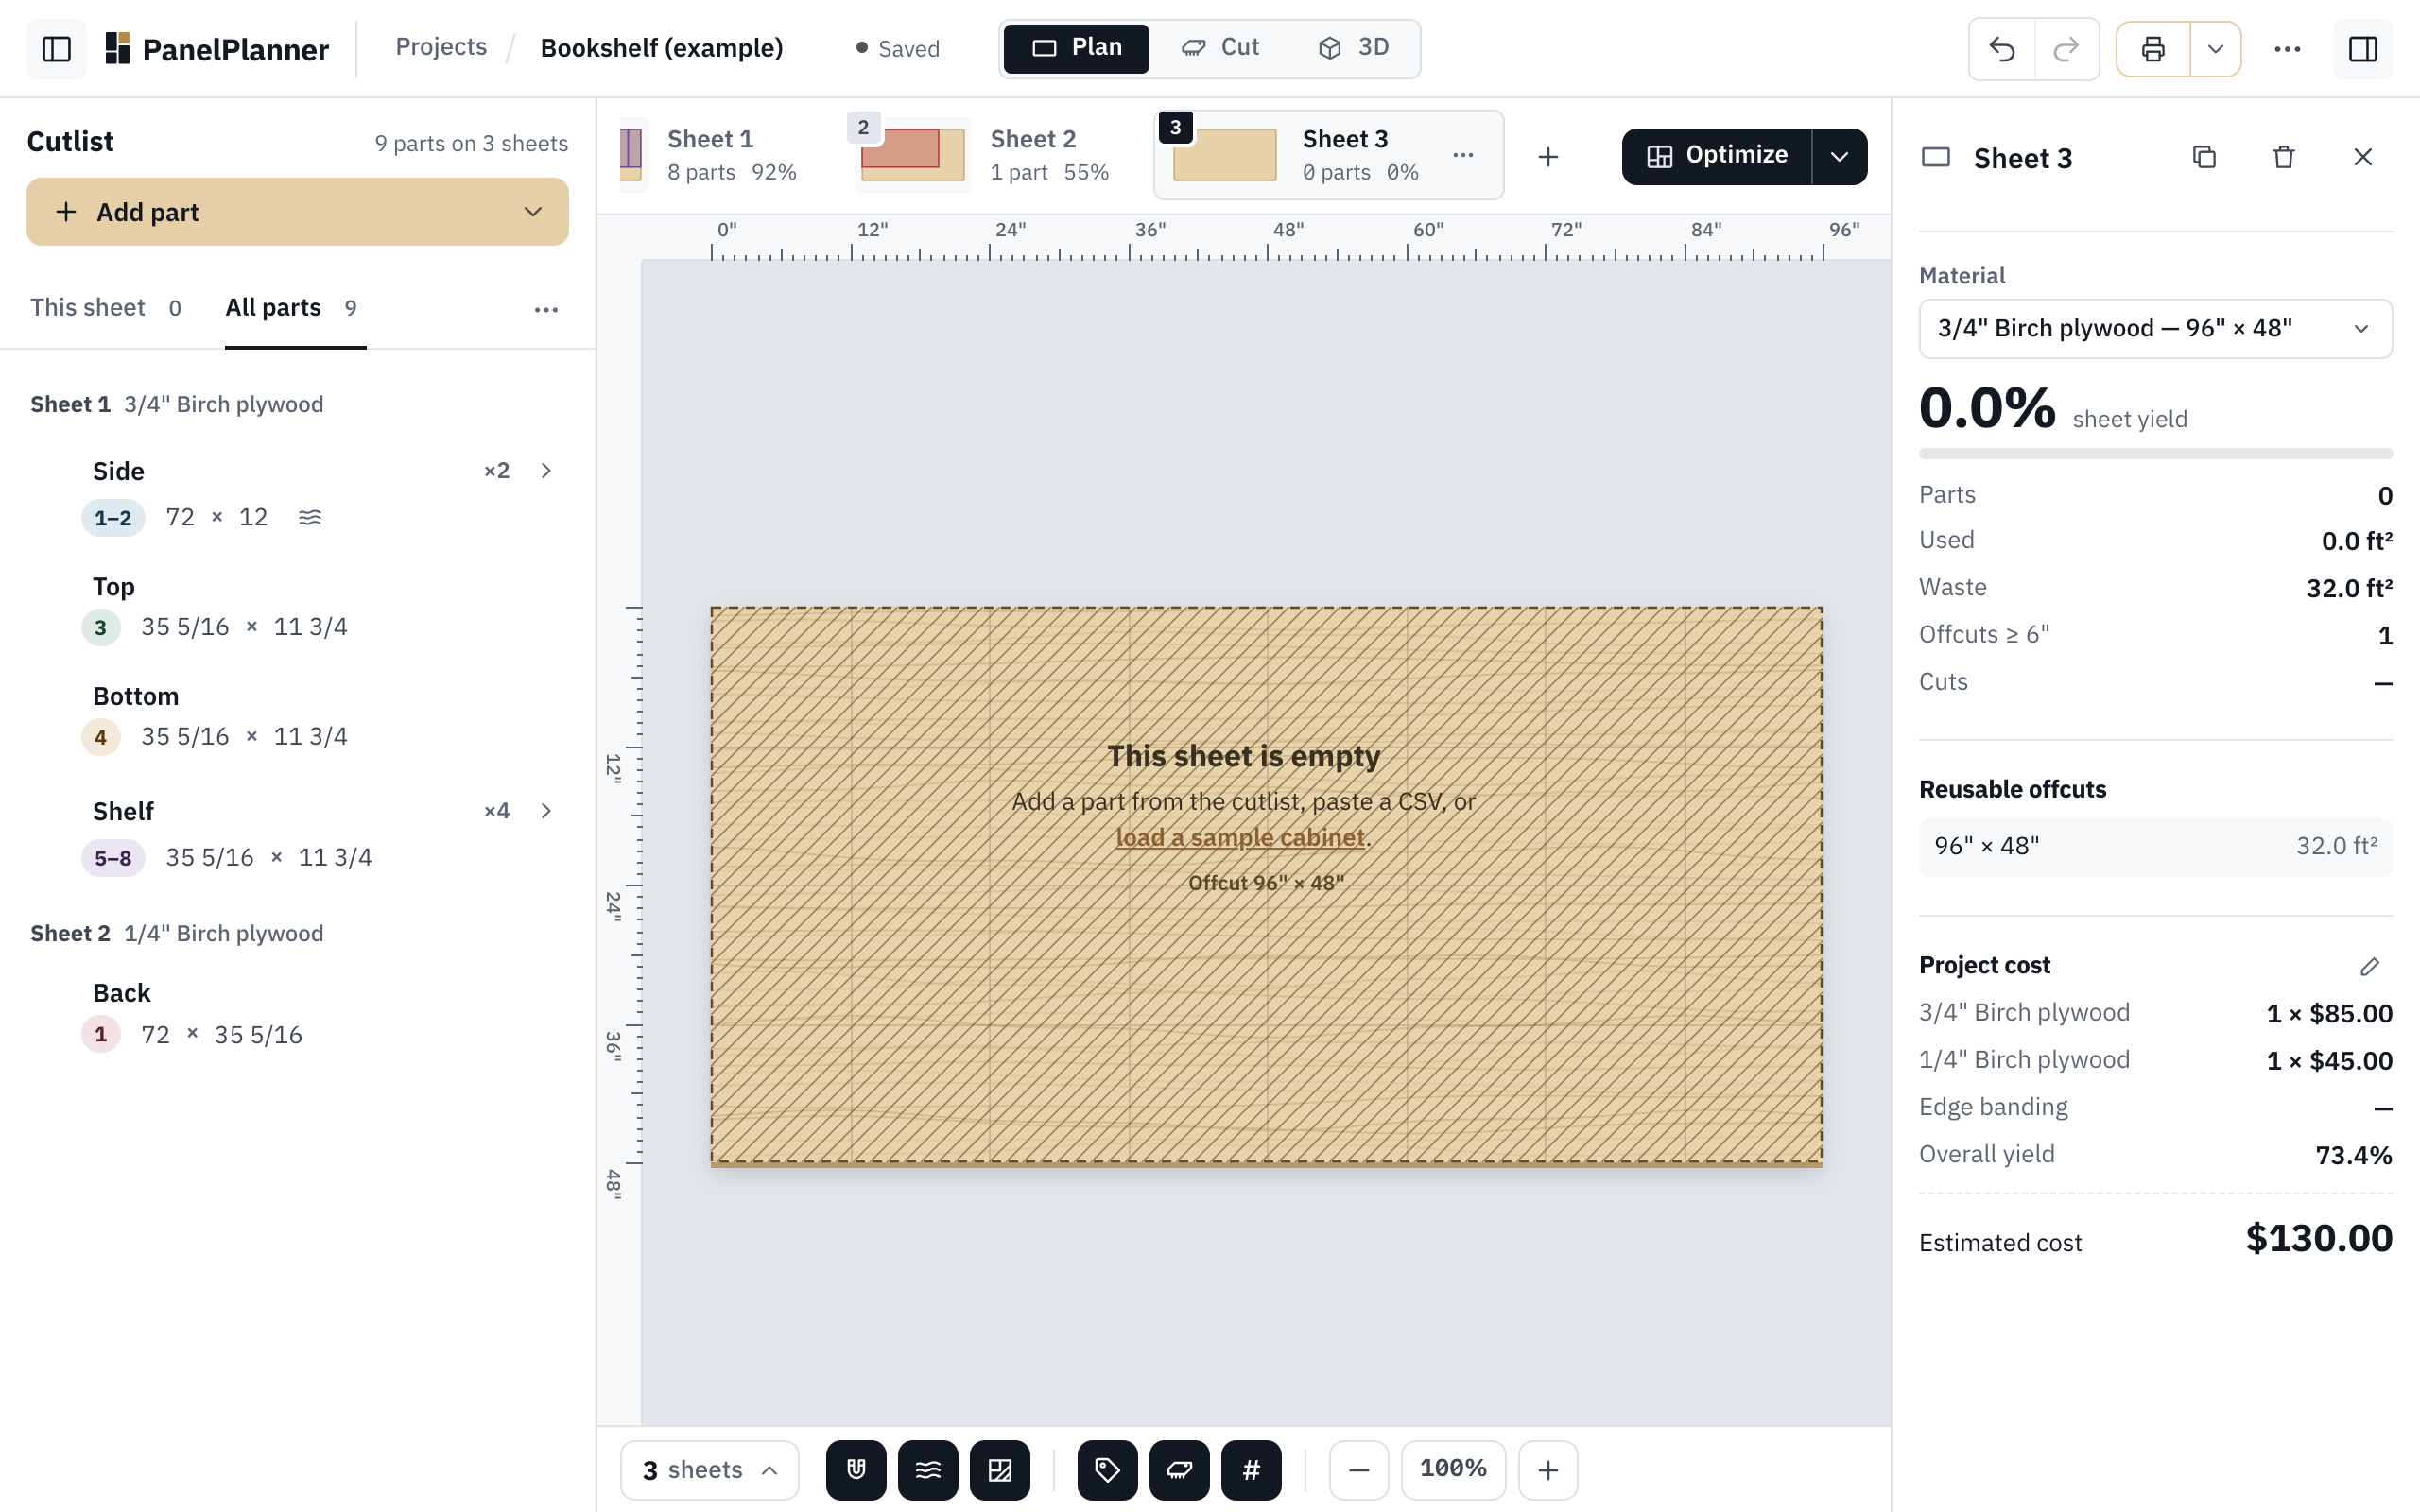
Sheet 3 is empty, so it has no group in the list yet. -
An empty sheet has no group to drag into, so put the first parts on it from the menu: click the ⋯ at the end of the Side ×2 row, choose Move to sheet, then 3. Sheet 3.
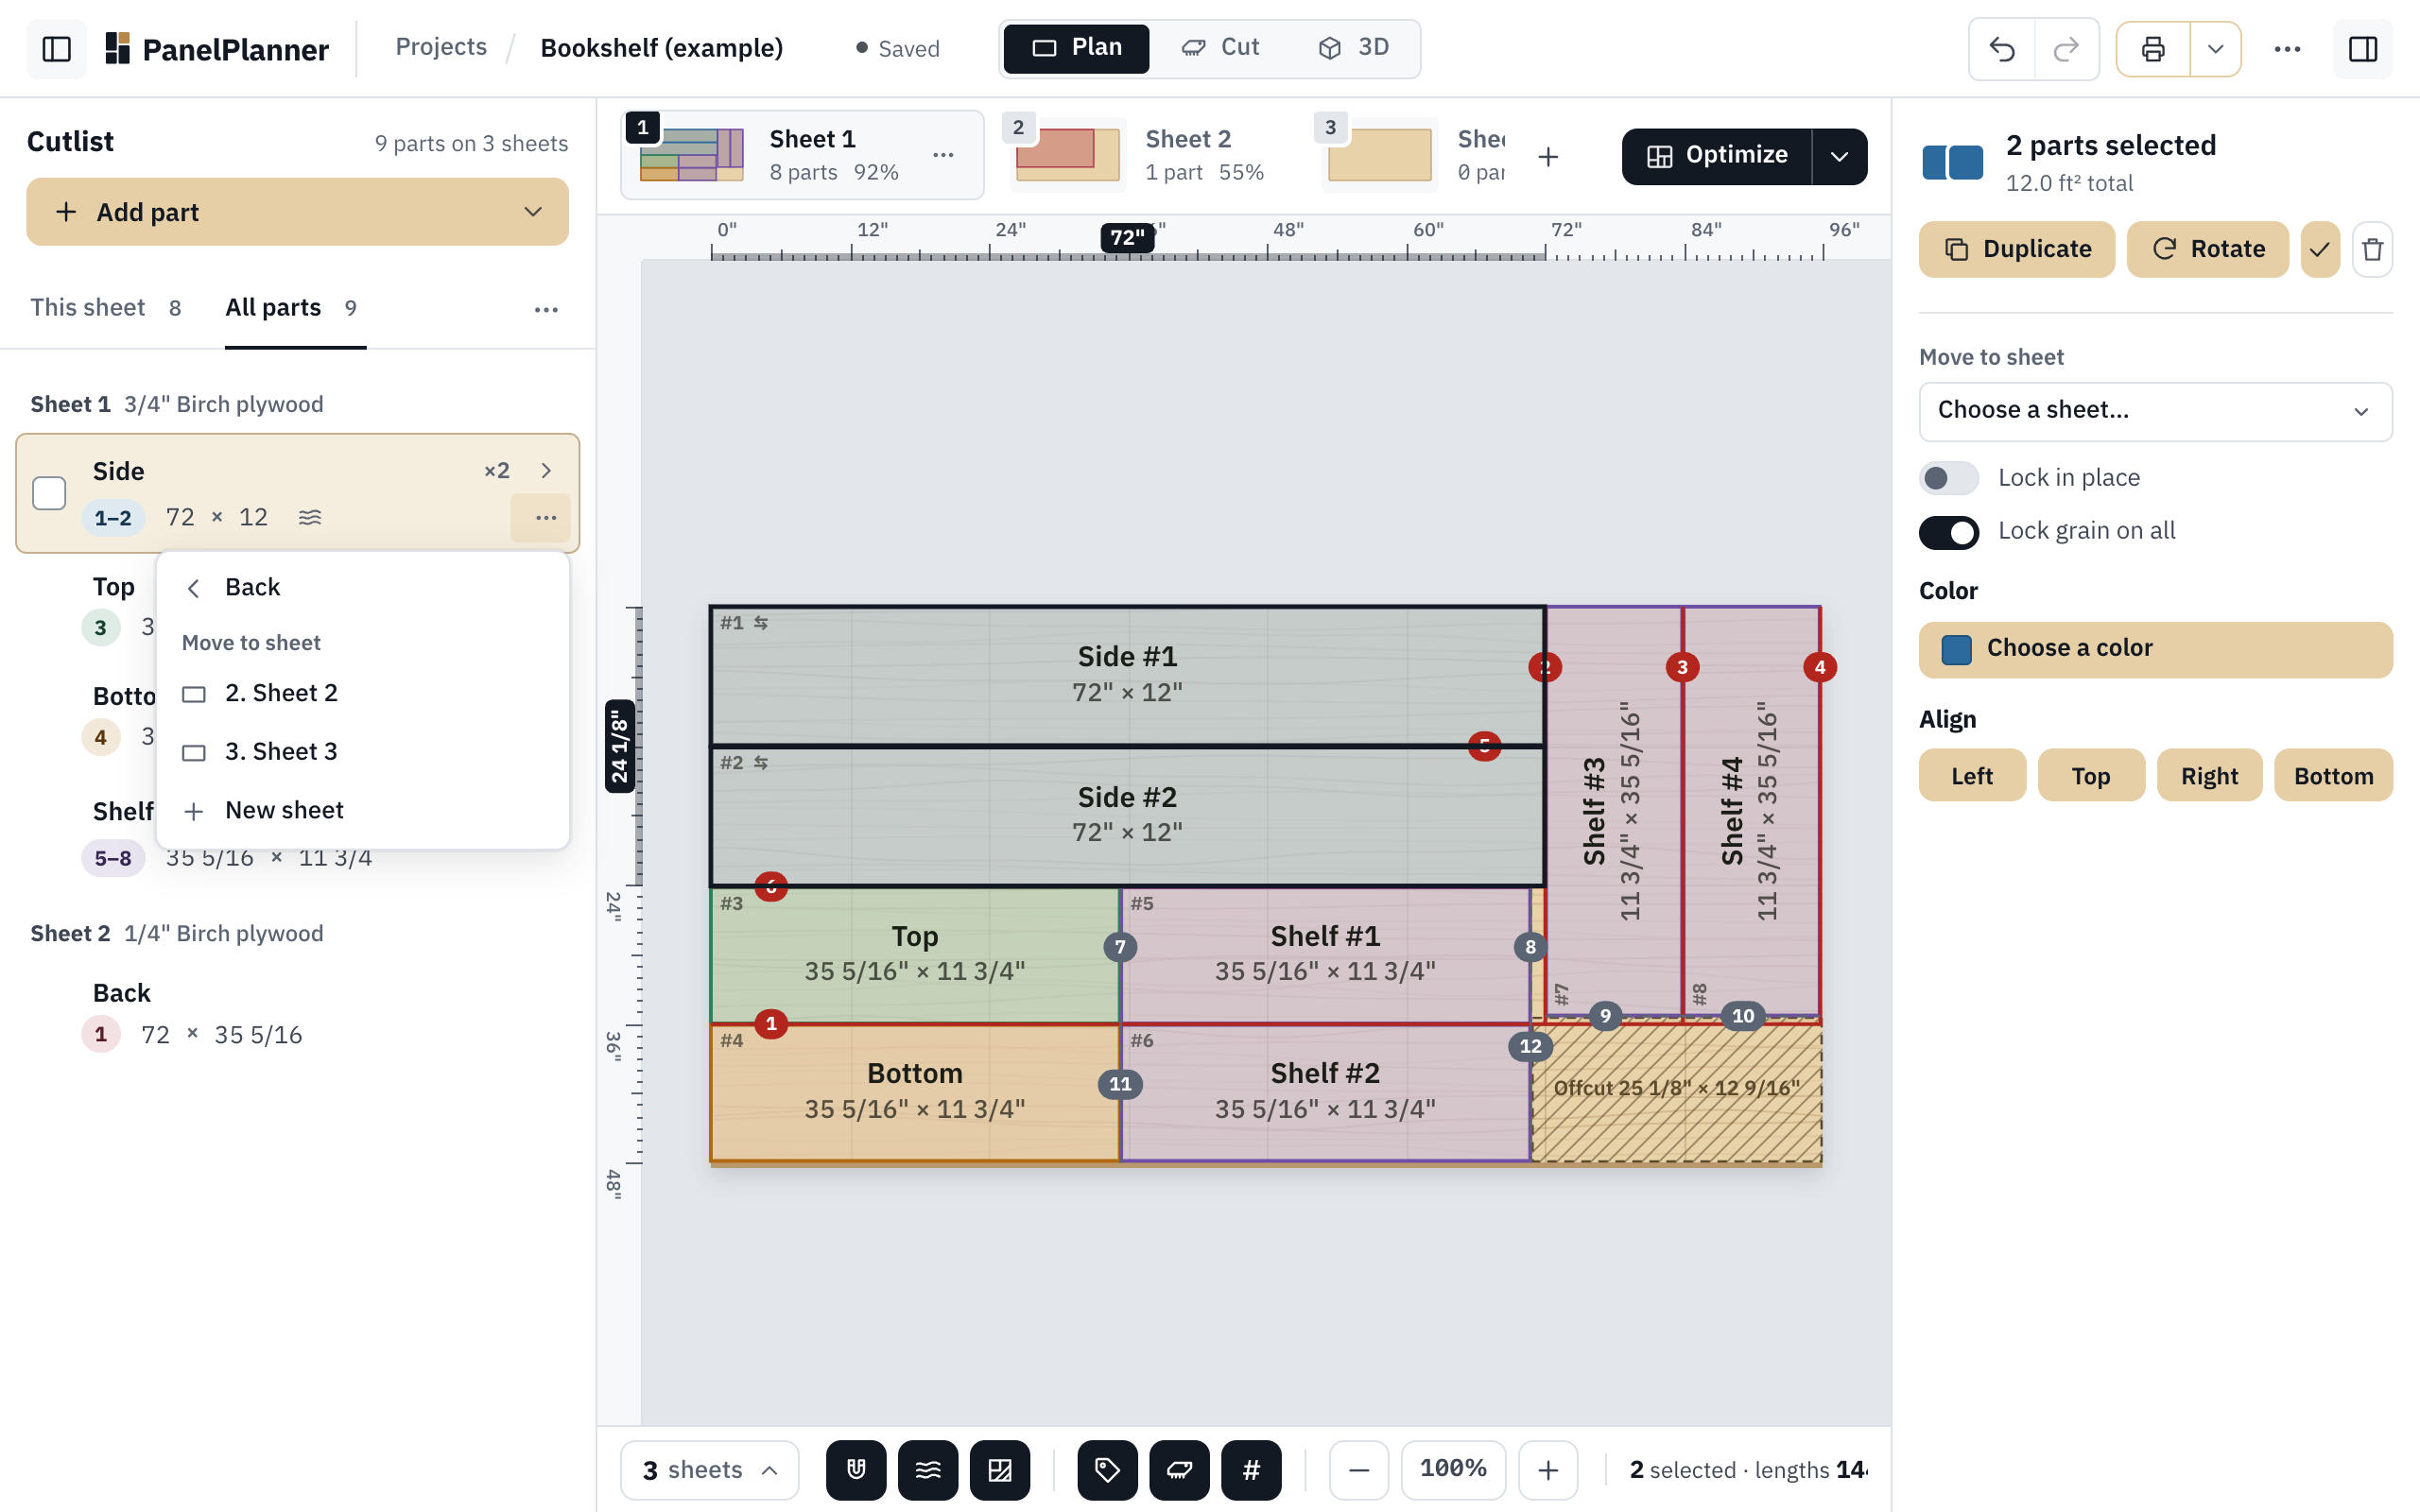
The row's menu, open at Move to sheet. Both sides move together, because the row holds both. -
The sides move to Sheet 3, and the list now has a Sheet 3 group. Press on Top's number badge (it reads 1, as badges are numbered on each sheet) and drag it down into the Sheet 3 group, below Side. A line shows where it will land, and the part's name follows the pointer.
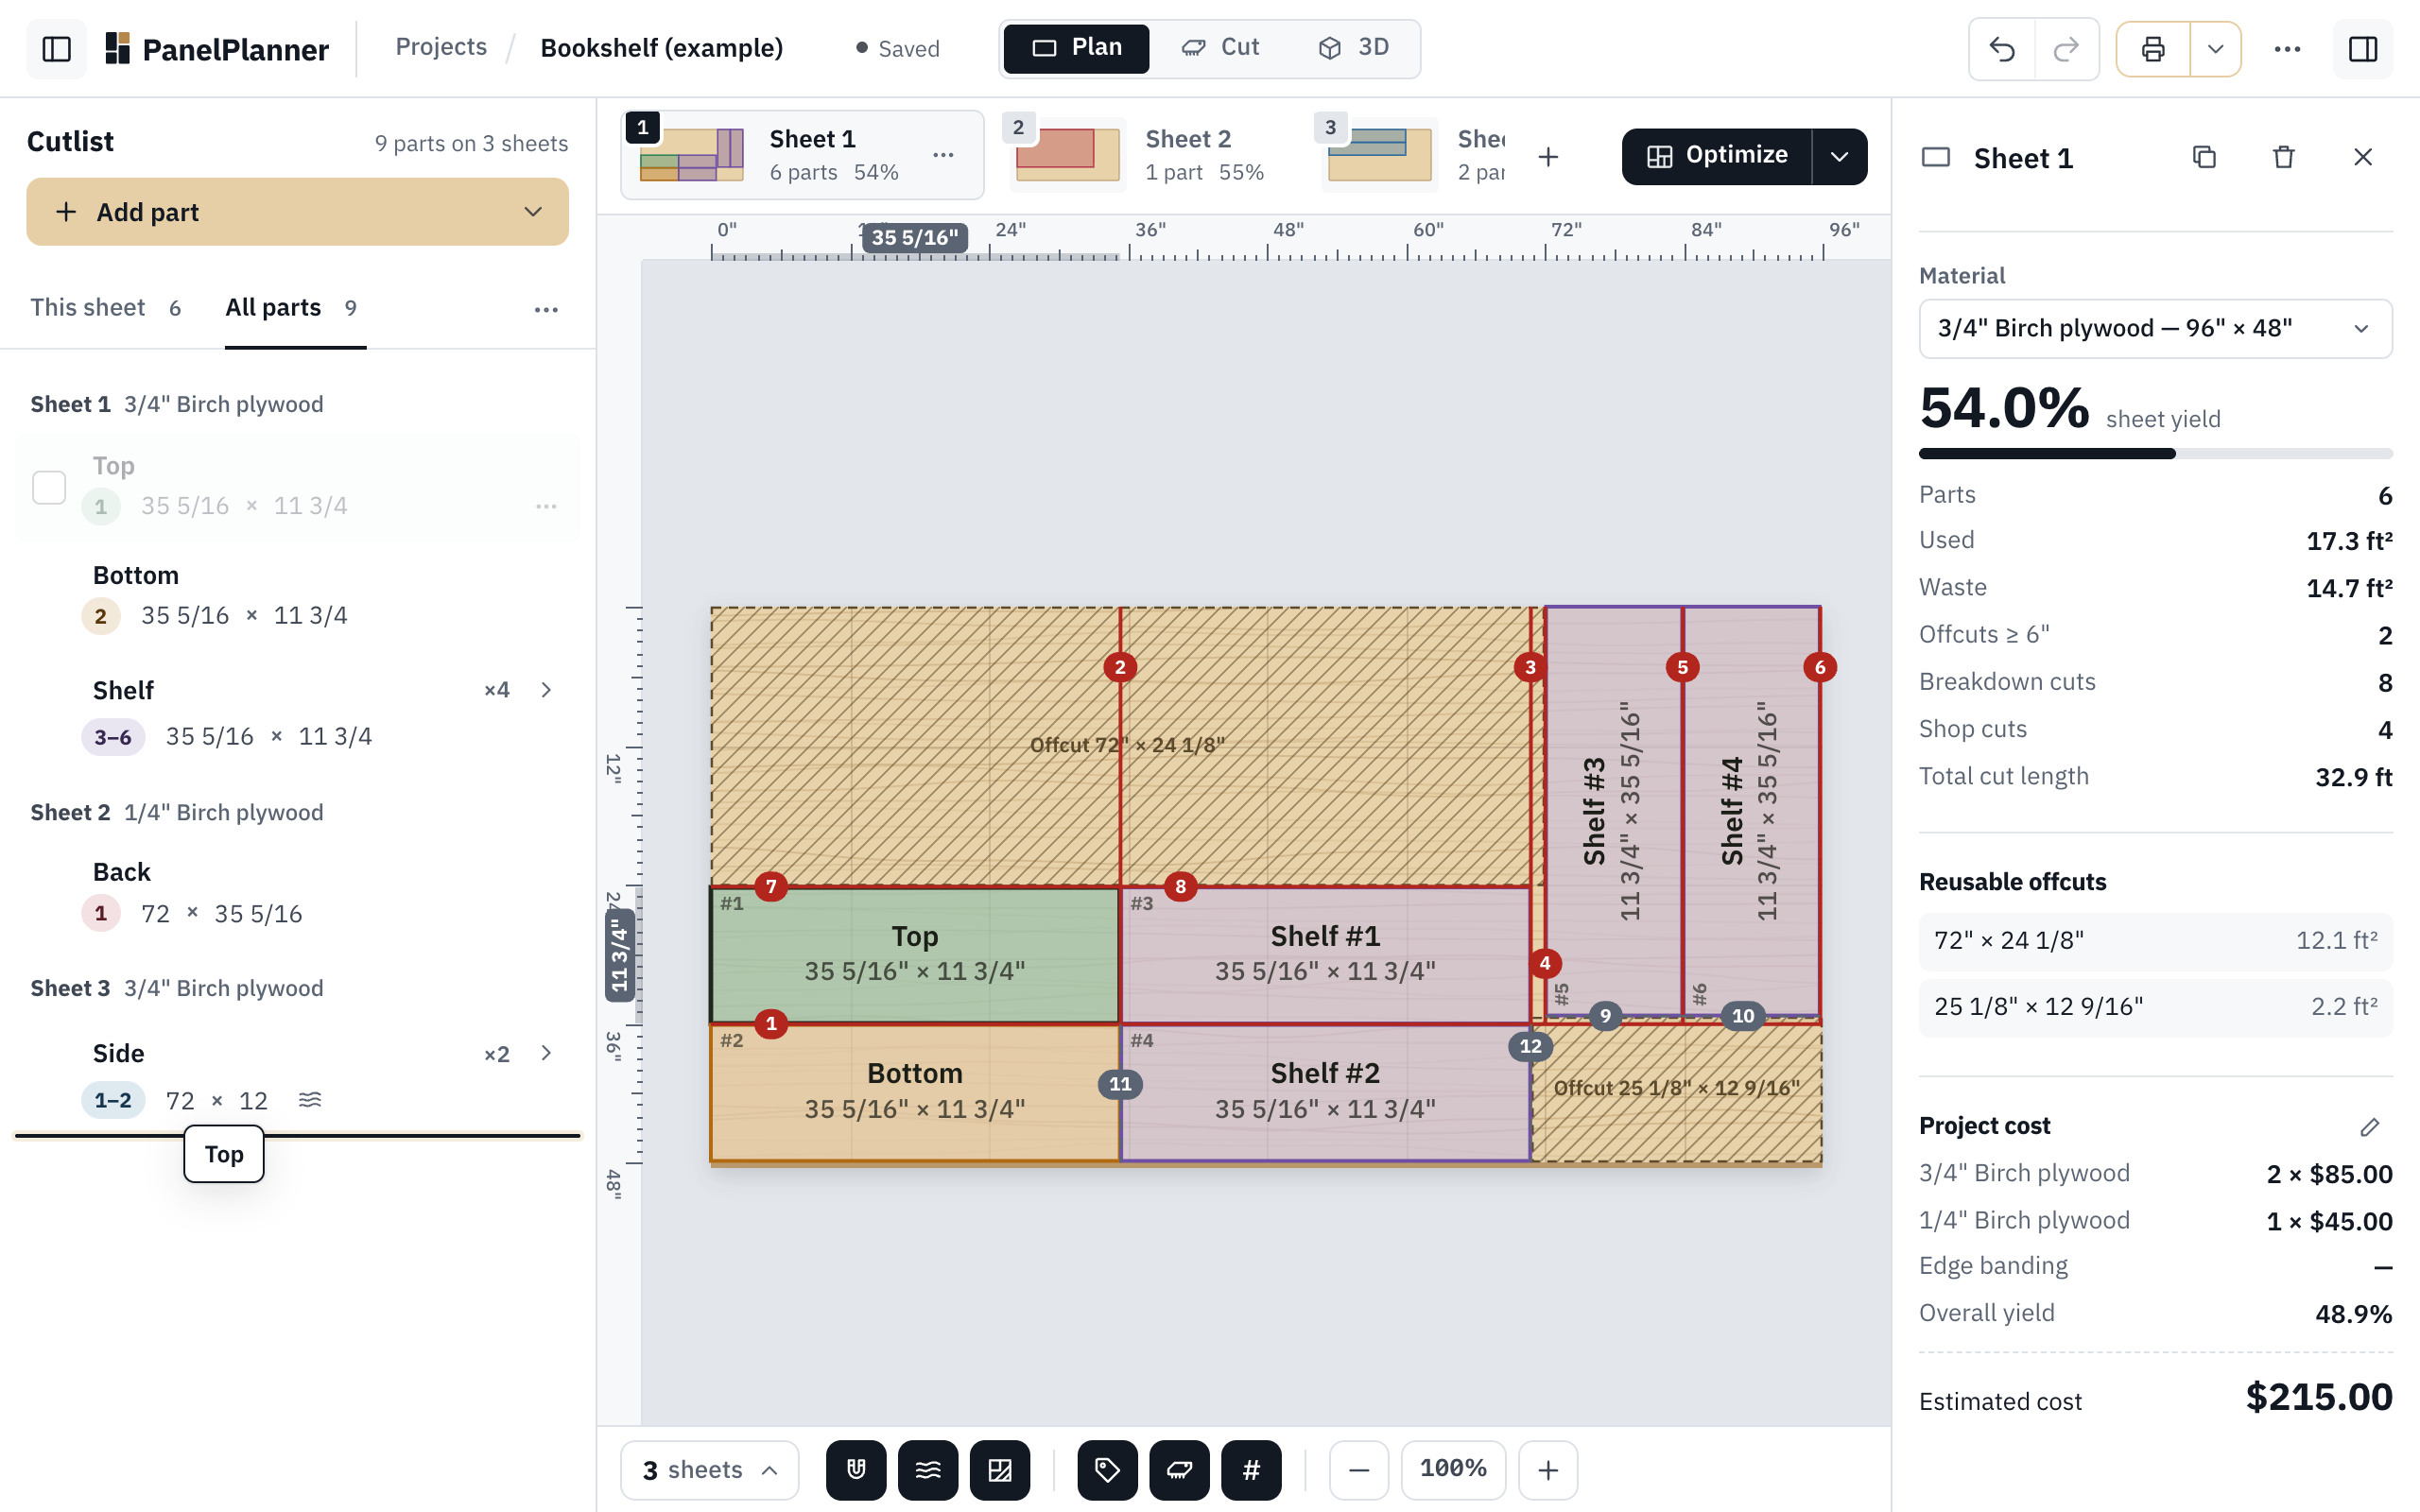
Dragging Top by its badge. The line under Side shows it will land in the Sheet 3 group. -
Let go. Top moves to Sheet 3, into free space below the sides, and Sheet 3 opens. A message says Moved “Top” to Sheet 3, with Undo beside it.
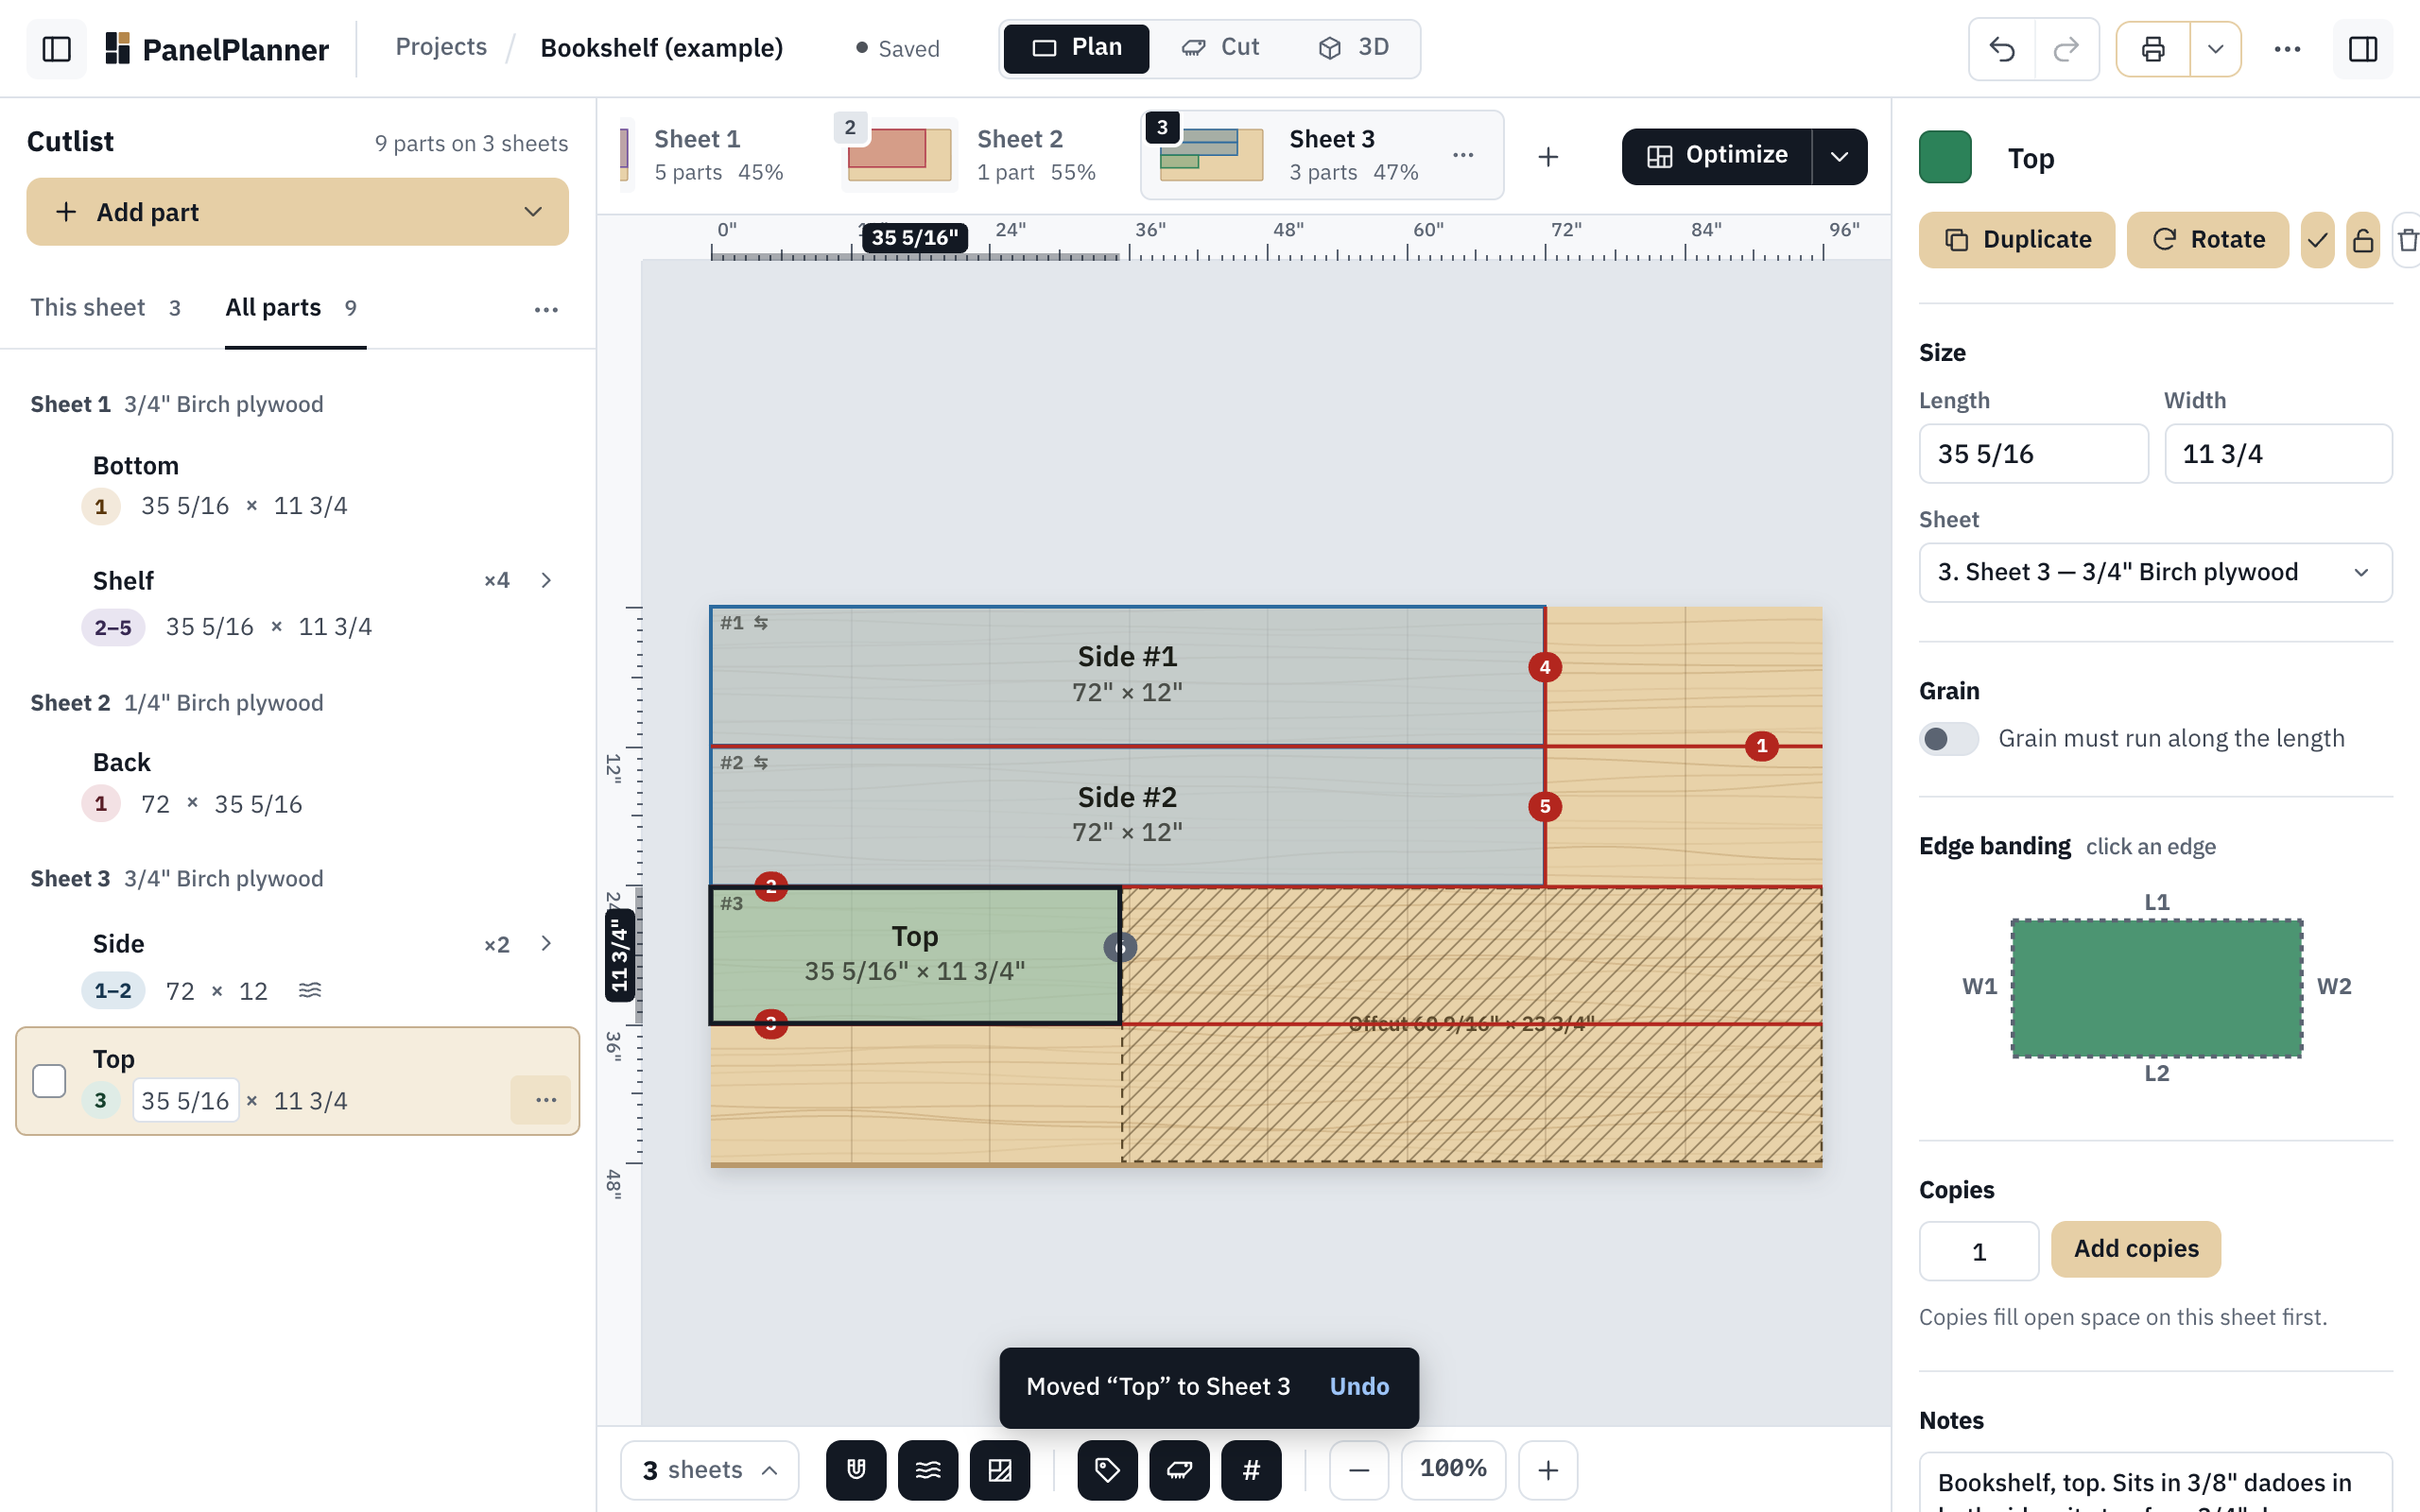
Top is on Sheet 3 with the sides. The estimated cost now counts a second sheet of 3/4" plywood: $215.00 instead of $130.00.
Good to know
- A part takes the material of the sheet you move it to. Drop the top into the Sheet 2 group and it would become 1/4" plywood, so drag between sheets of the same material unless you mean to change it.
- Dragging a part on the sheet drawing moves it only within that sheet; parts snap to the edges and to each other with a blade's width between them.
- To start a new sheet with the parts in one go, choose New sheet under Move to sheet in the same row menu: it adds a sheet of the same plywood and moves the parts onto it.
- A row like Side ×2 drags both parts at once, and dragging a row that is already selected brings the whole selection along.
- Optimize packs everything onto as few sheets as it can, which would undo your choice. Lock a part first with L to keep it where you put it.
Other ways to move a part
- Right-click the part on the sheet and pick a sheet under Move to sheet.
- Select the part and press a number key, 1 to 9, to send it to that sheet.
- Select the part and change Sheet in the right panel.
Try it
Try it Opens the bookshelf example as your own copy.