Planner
Make a cut list from your measurements
You know the finished size of every part. Type them in and PanelPlanner lays them out on your sheets, with room for the saw blade between them. This guide types in the parts of the bookshelf example: two sides, four shelves, a top and a bottom from 3/4" plywood, and a back from 1/4". You end up with the same parts on the same sheets as the example, which Try it at the end opens.
Steps
-
Click Projects in the top bar, then I have my measurements. A new, empty project opens with the Add part form ready.
-
Click the project name in the top bar and type a name for it, such as Bookshelf.
-
In the Add part form, fill in the first part: Part Side, Qty 2, Length 72, Width 12.
Sizes can be fractions (35 5/16 or 35-5/16), decimals, feet and inches (4' 2") or millimetres (1335mm).
-
Click More options and tick Grain runs along the length, so the sides keep the grain running up and down.
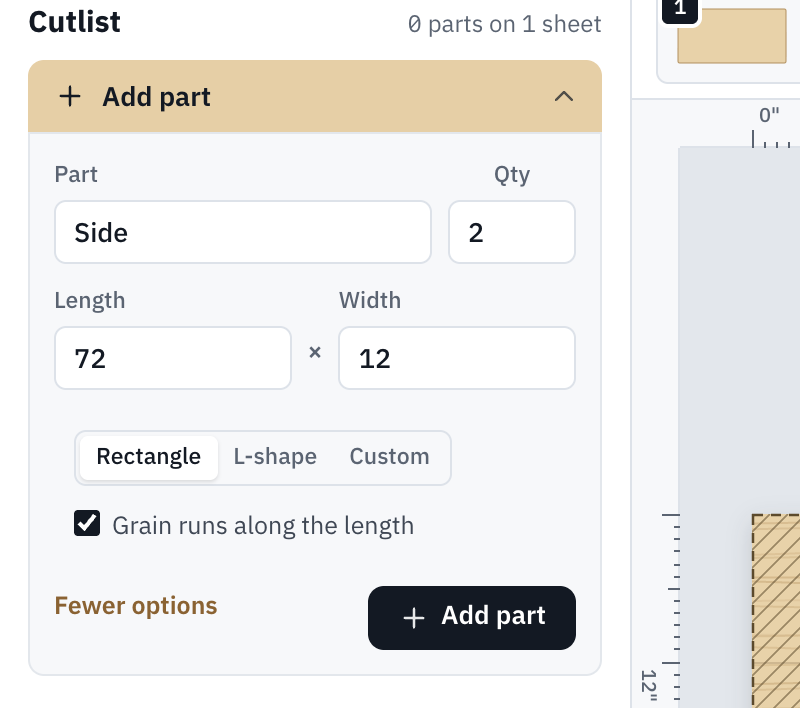
The sides, ready to add, with their grain locked. -
Press Add part, or Enter. The part goes into open space on the sheet, and the form stays open for the next one.
-
Untick Grain runs along the length (it stays ticked after an add), then add the rest the same way: Shelf, 4 at 35 5/16 × 11 3/4; Top, 1 at 35 5/16 × 11 3/4; Bottom, 1 at 35 5/16 × 11 3/4; Back, 1 at 72 × 35 5/16. When a sheet is full, the next part opens a new sheet: here the back lands on Sheet 2.
-
Click the Add part bar to fold the form away, then click All parts. The list shows every part, grouped by the sheet it is on.
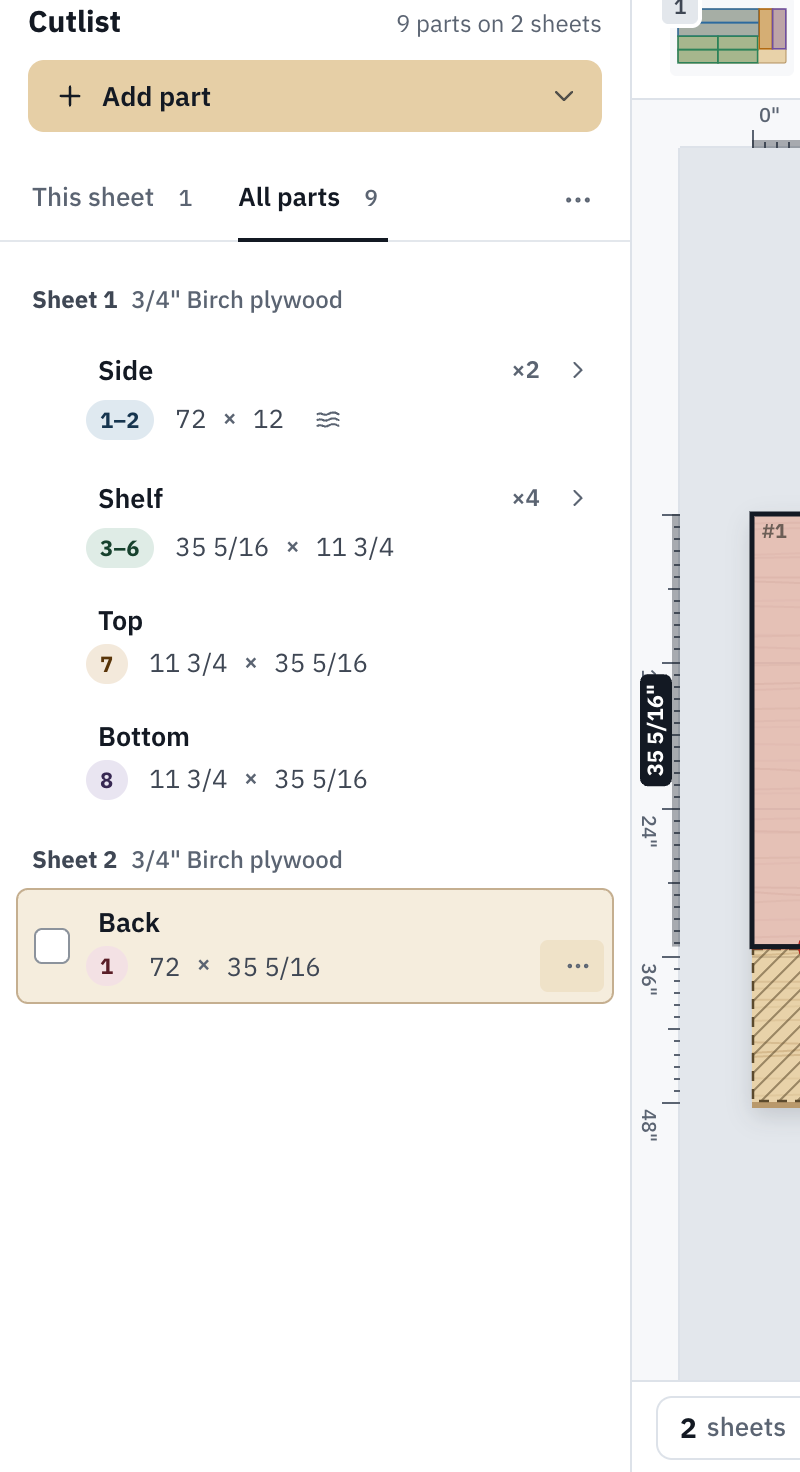
All nine parts, grouped by sheet. Parts with the same name and size share one row, like Side ×2. Both sheets are 3/4" plywood so far. -
Click the Sheet 2 tab, press Esc so the right panel shows the sheet, and set its Material to 1/4" Birch plywood. A part takes the material of the sheet it is on, so the back is now 1/4".
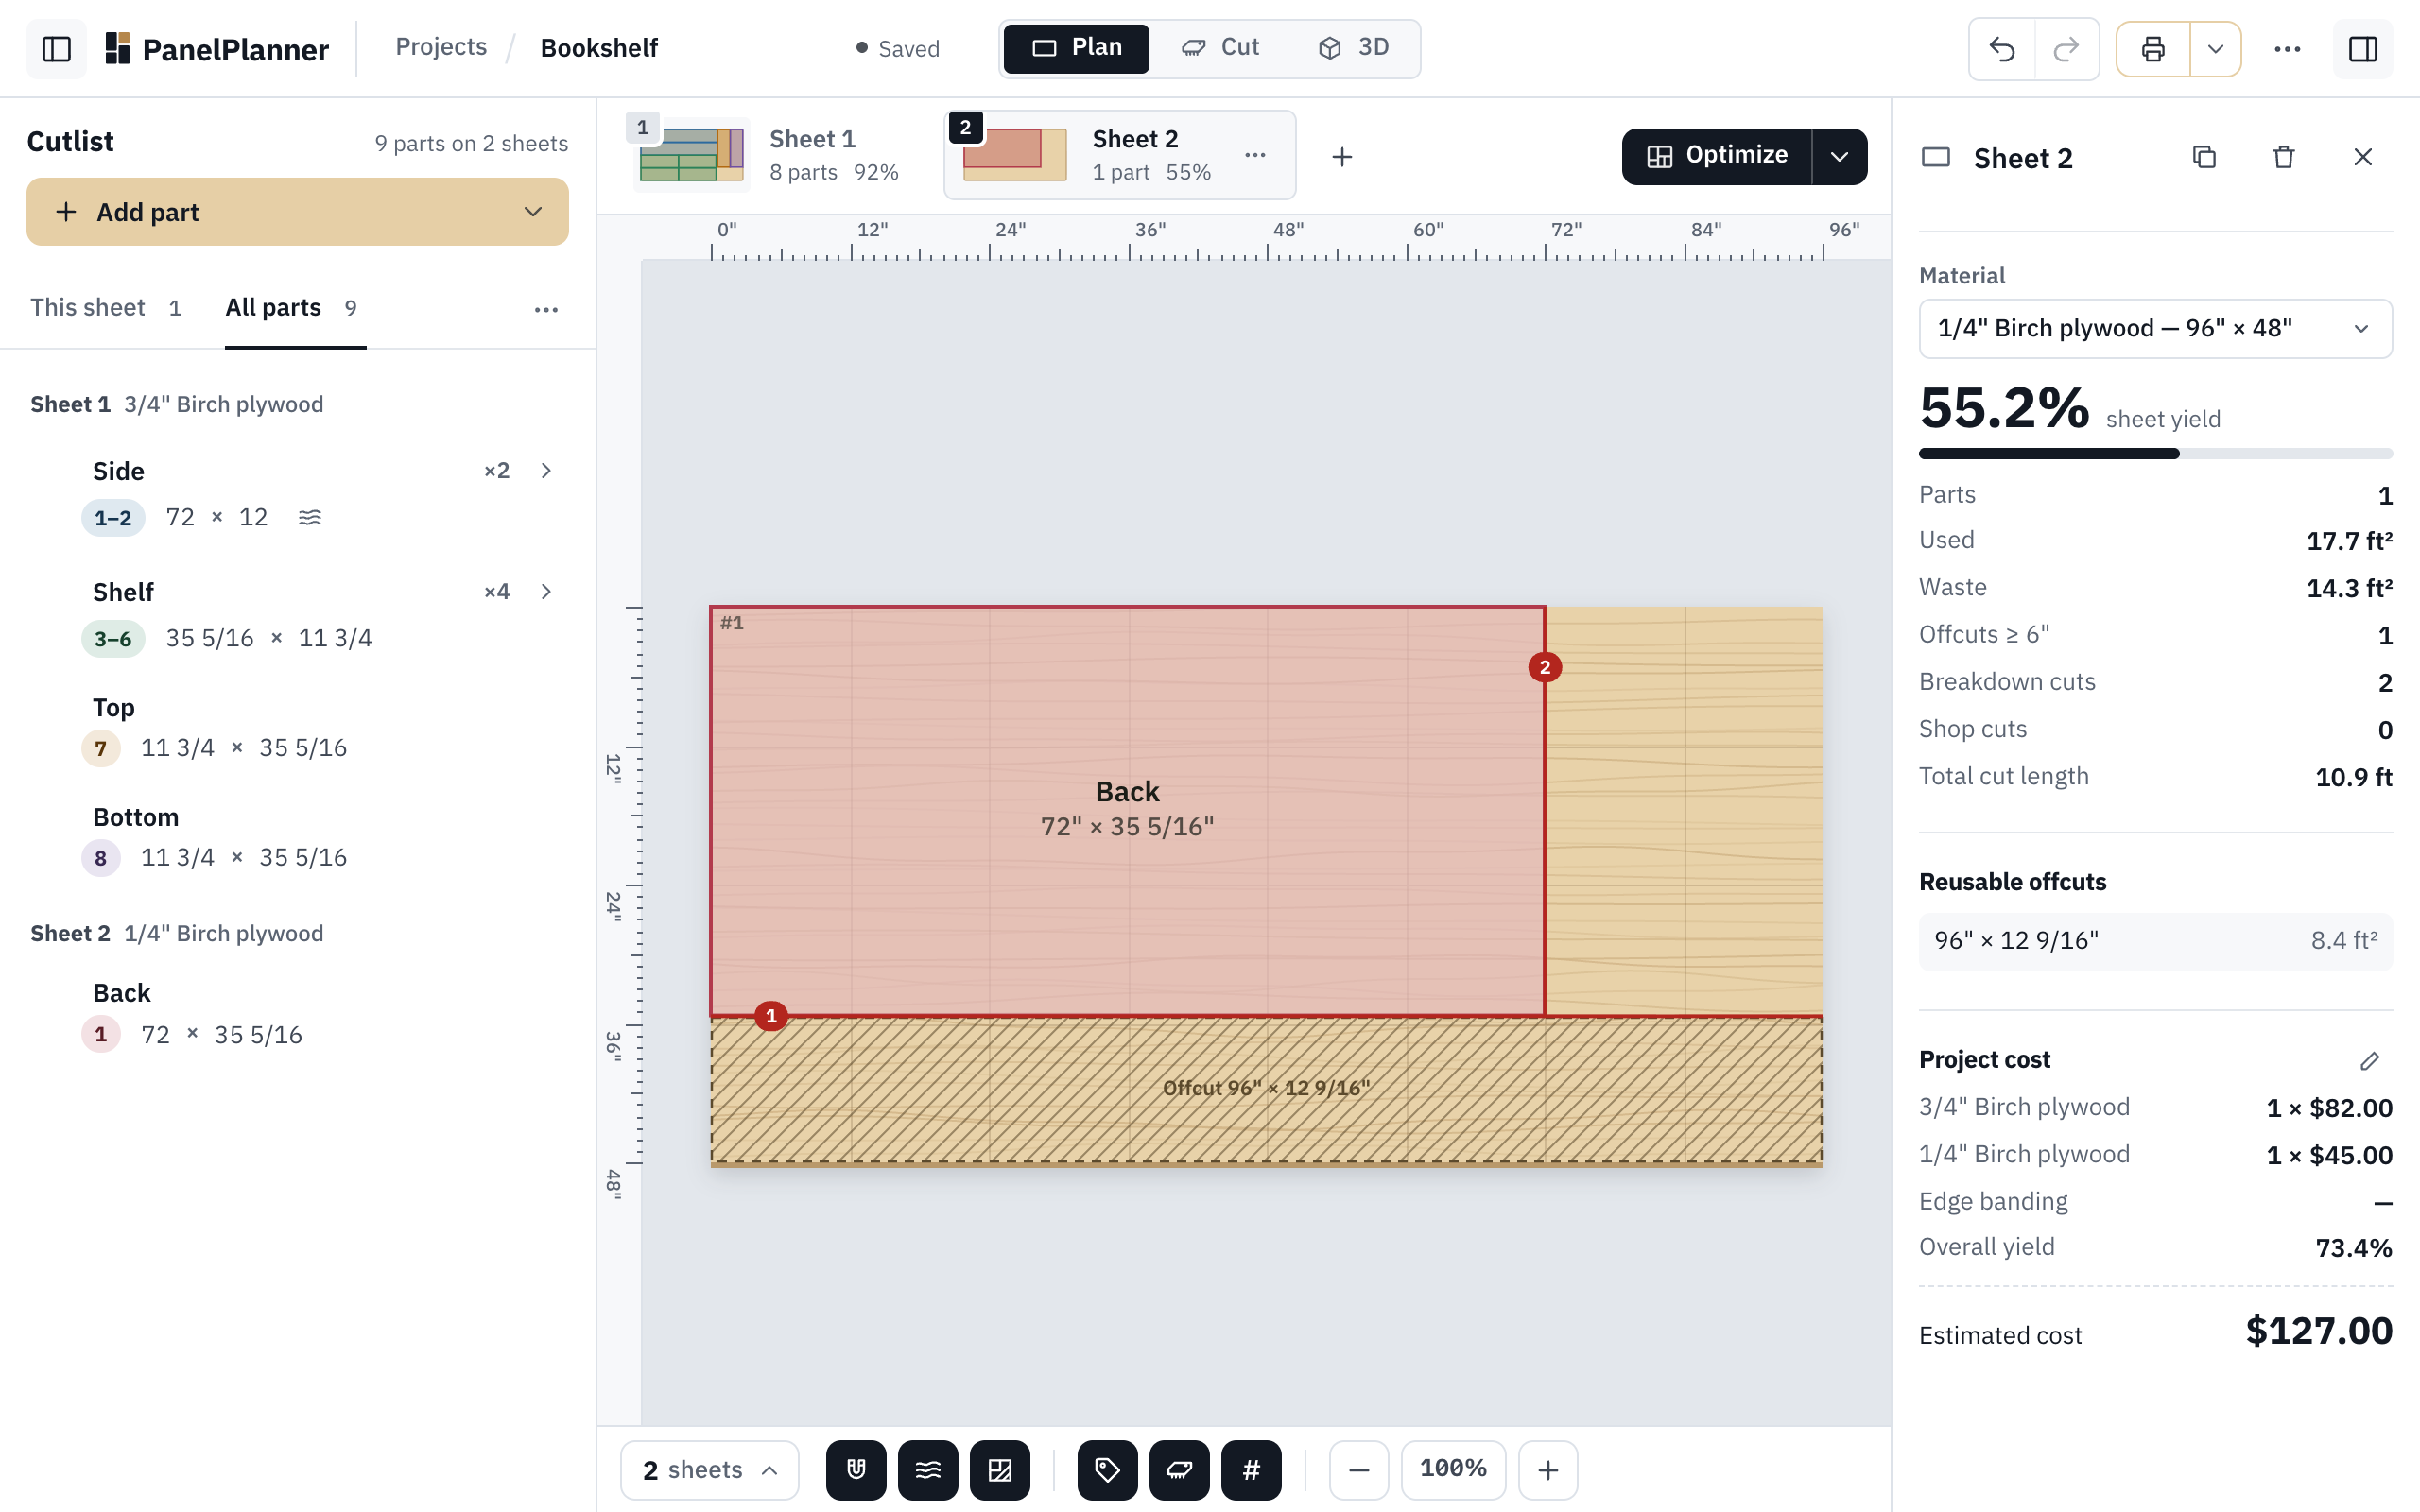
Sheet 2 is 1/4" Birch plywood now, and the list groups the back under it. -
Click Optimize, at the top right of the sheet tabs. PanelPlanner lays every part out again on as few sheets as it can, keeping each material on its own sheets. Click the Sheet 1 tab to see it.
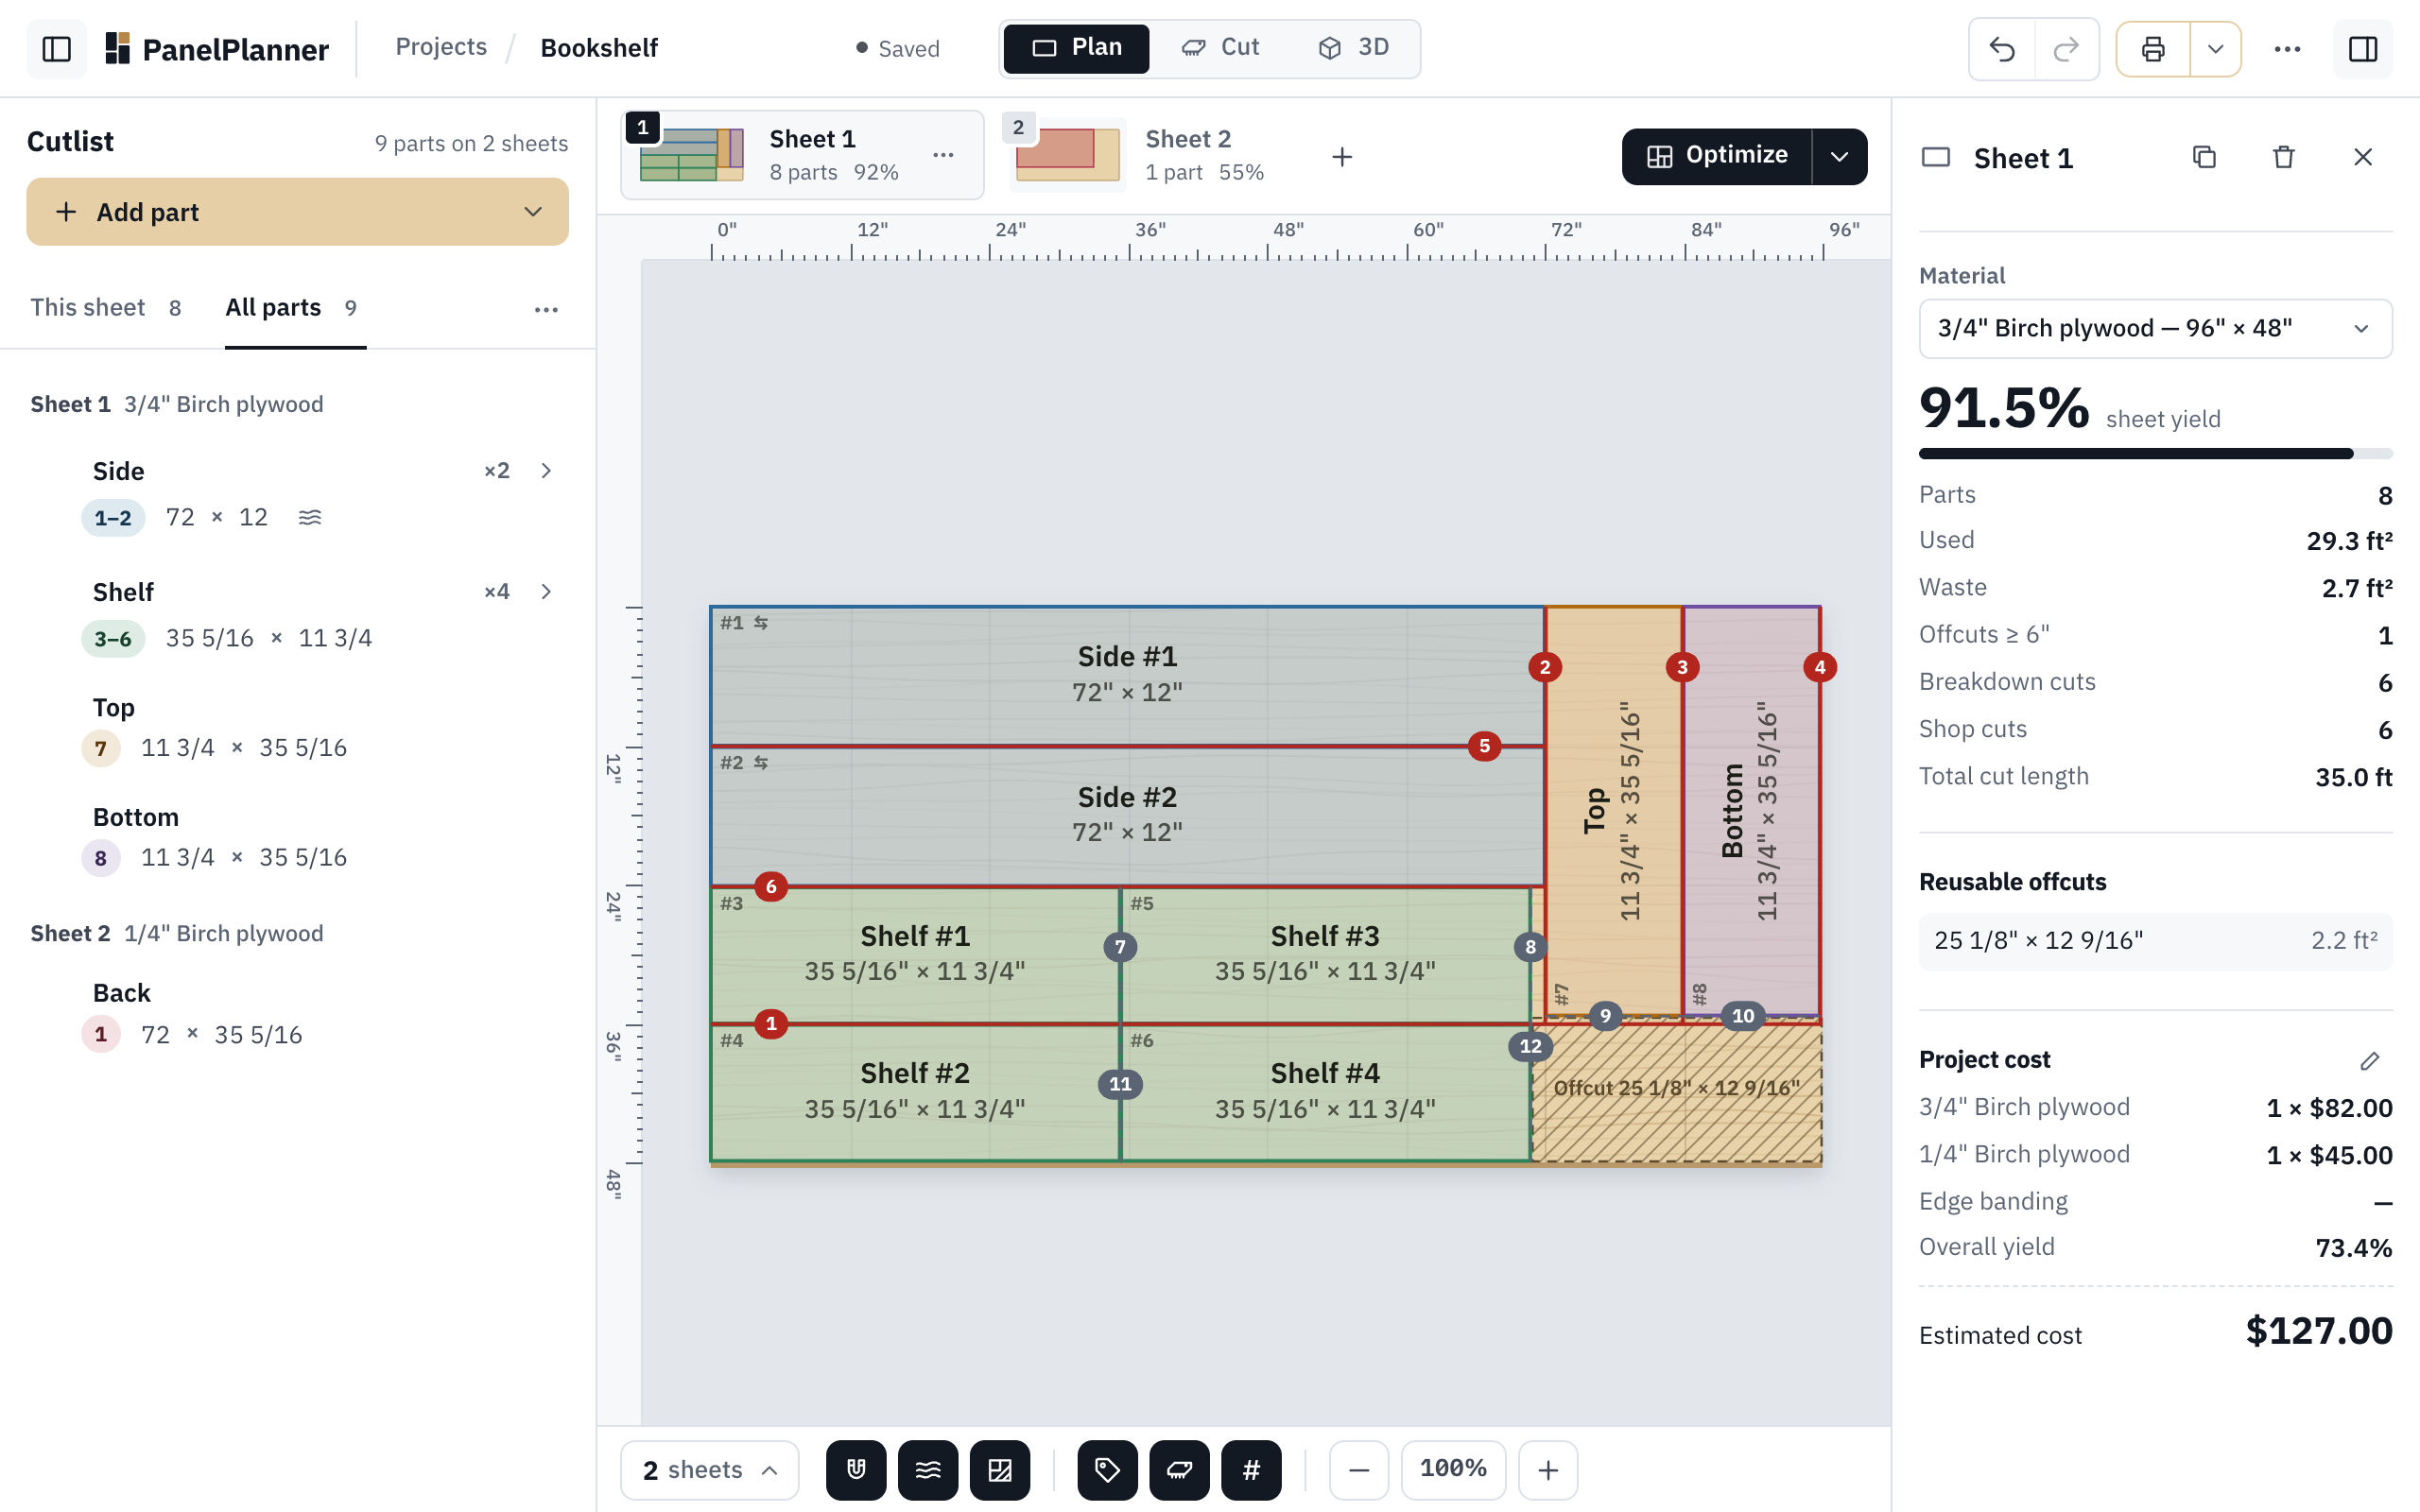
After Optimize: all eight 3/4" parts fit on one sheet at 92% yield. The estimated cost at the bottom of the right panel is for the whole project, both sheets.
Good to know
- Your bookshelf now has the same parts on the same sheets as the bookshelf example, which Try it opens. The example's estimated cost differs a little ($130.00) because its 3/4" sheet is priced at $85.00 where a new project starts at $82.00. Prices are per material: More menu (⋯), Project settings….
- PanelPlanner leaves a blade's width between parts, 1/8" to start. To change it, open Project settings… and type your blade's width in Blade kerf.
- Your project saves in the browser as you work. No account needed.
Try it
Try it Opens the bookshelf example, the finished version of what this guide types in, as your own copy.